Overhead powerline safety
![](https://www.infrastructureproducts.com.au/wp-content/uploads/2022/05/guardian-goalposts-case-study-3.jpg)
![](https://www.infrastructureproducts.com.au/wp-content/uploads/2022/05/guardian-goalposts-case-study.jpg)
Project details
The simplicity of setting up Guardian Goalposts meant that the system could be assembled and disassembled by one person in minutes, without the need to perform preliminary digging to locate existing underground services.
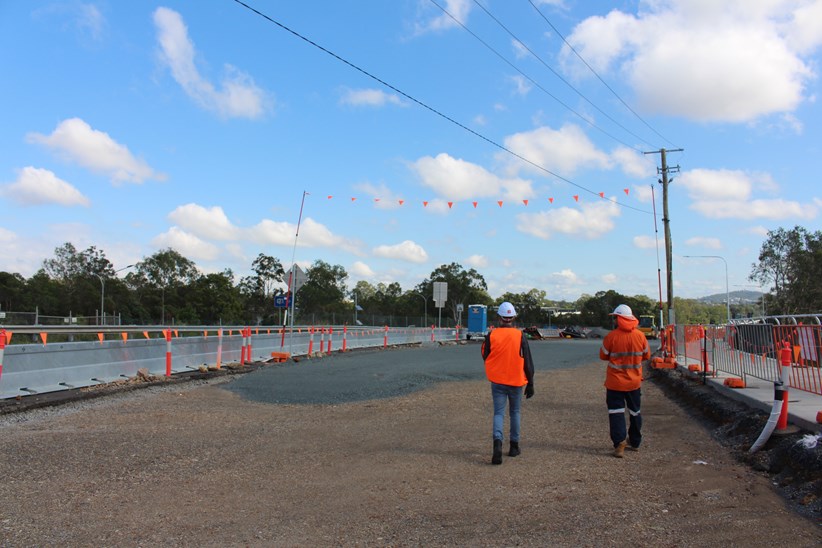
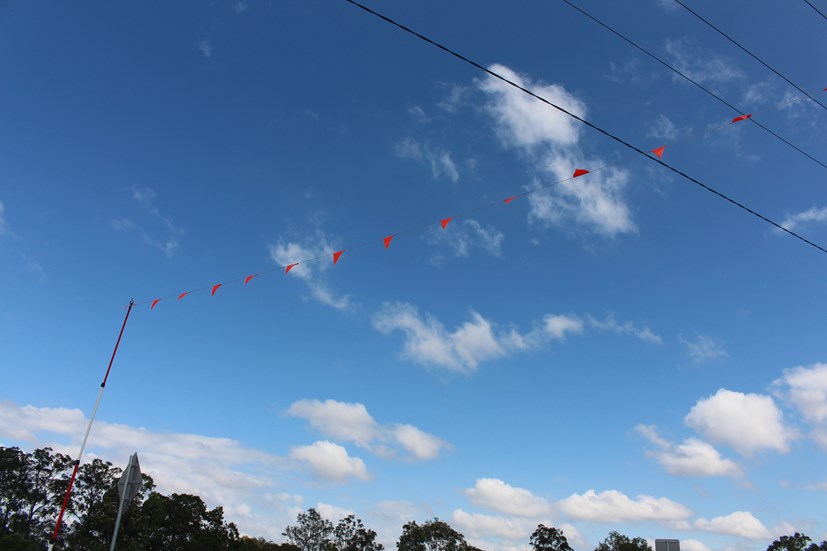
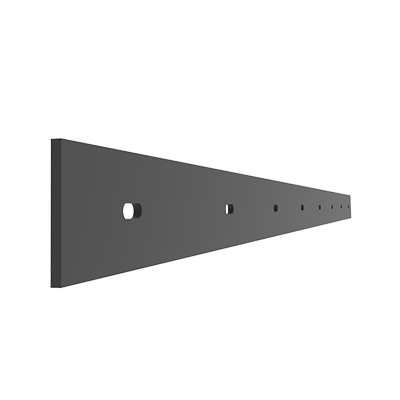
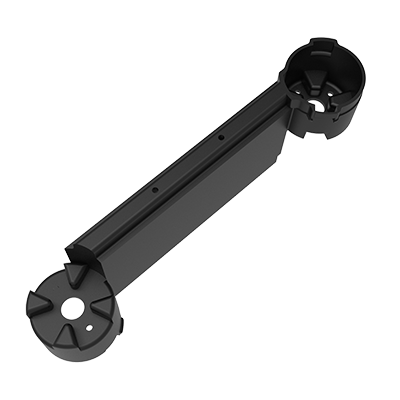
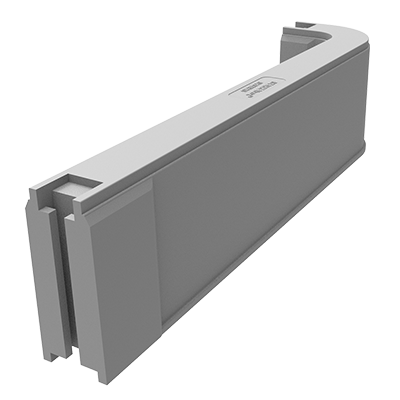
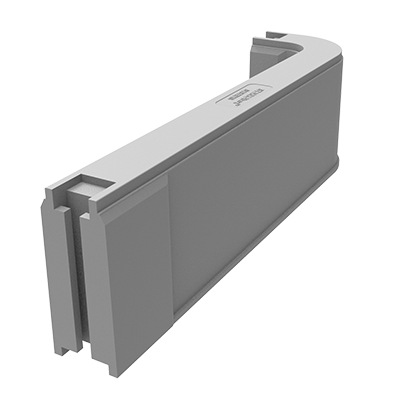
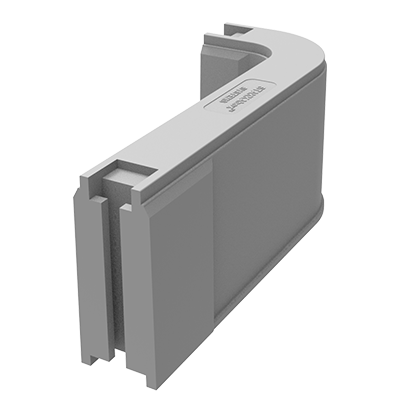
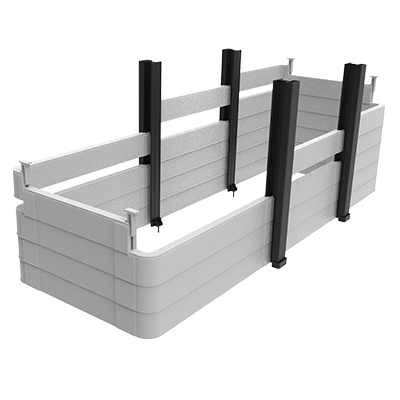
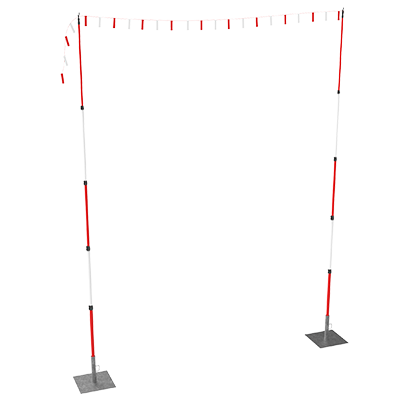
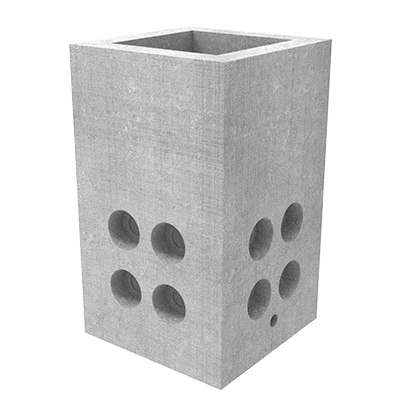
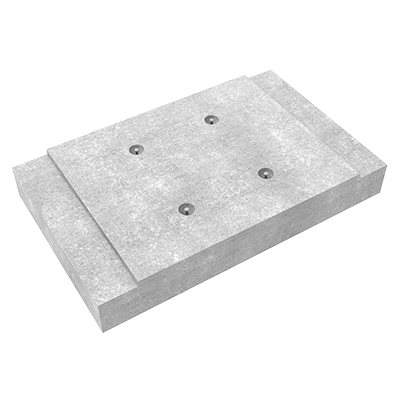
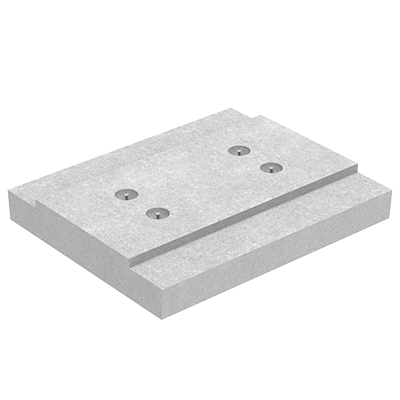
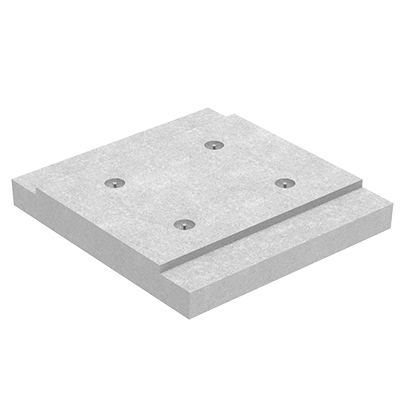
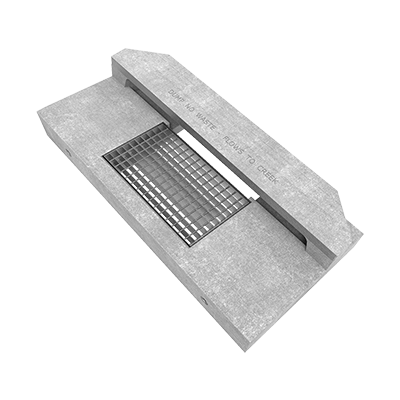
Guardian Goalposts do not require drilling poles/holes for conduit uprights or assembling stabilising rope systems. Driving star pickets into the ground was also not required, thereby reducing OH&S risk associated with such activity and increasing the flexibility of use of the product.
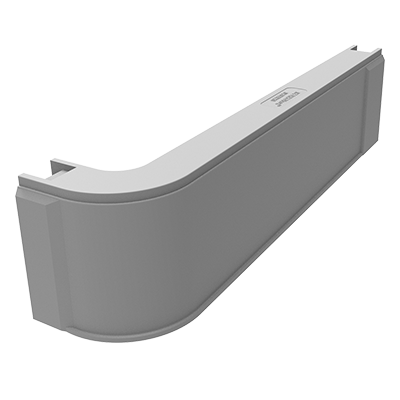
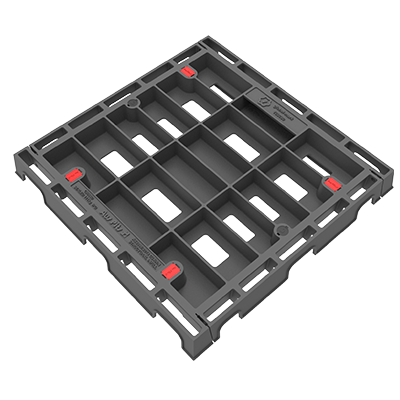
Due to the project spanning a large area with several locations requiring overhead powerline protection systems, the Guardian Goalposts system was able to be reused across a variety of height and site requirements and involved little to no maintenance over time. Once disassembled, the Guardian Goalposts were easily loaded into a standard car and stored on site without the need for ample storage space. Due to the sustainability of the product, Guardian Goalposts offered the versatility to accommodate the changing landscape and requirements of not only the Pacific Motorway Upgrade: M1/M3 Gateway Merge Project, but also future projects completed by the Department of Transport and Main Roads.
By providing a product that meets Australian Constructors Association guidelines and Safe Work Australia standards, Cubis was able to successfully provide an innovative engineered solution, compared to traditional non-engineered overhead warning systems, that effectively isolated hazards and visibly enforced safety zones across the project site. This resulted in a solution that not only allowed for total flexibility across the life of the project, but also delivered a high level of OH&S management while providing both cost and time benefits.
Challenge #1
Large project area with several locations requiring overhead powerline protection systems
Challenge #2
Effectively accommodate changing work site conditions throughout the progression of the project
Challenge #3
Provide a flexible and sustainable solution throughout the life of the project that reduced OH&S risk
Products Used
![](https://www.infrastructureproducts.com.au/wp-content/uploads/2023/09/50207710-MONObox™-P5-PLASTIC-PIT-INJ-TELSTRA-APPROVEDx.png)
![](https://www.infrastructureproducts.com.au/wp-content/uploads/2022/05/50201020-MONObox™-P6-PLASTIC-PIT-2-1.png)
![](https://www.infrastructureproducts.com.au/wp-content/uploads/2022/05/50201021-MONObox™-P8-PLASTIC-PIT-2.png)
![](https://www.infrastructureproducts.com.au/wp-content/uploads/2022/05/50201031-MONObox™-P9-PLASTIC-PIT-2.png)
![](https://www.infrastructureproducts.com.au/wp-content/uploads/2022/08/50201802-STAKKAbox™-Fortress-HS5t.png)
![](https://www.infrastructureproducts.com.au/wp-content/uploads/2022/05/50201250-STAKKAbox™-Fortress-HS6eWS.png)
![](https://www.infrastructureproducts.com.au/wp-content/uploads/2022/05/50201060-PIT-CONCRETE-BELLTOP-8-CLASS-D-1.png)
![](https://www.infrastructureproducts.com.au/wp-content/uploads/2022/05/50201526-PIT-CONCRETE-UNIVERSAL-8-CLASS-B-2.png)
![](https://www.infrastructureproducts.com.au/wp-content/uploads/2022/05/50202564-PIT-CONCRETE-UNIVERSAL-8-LOCK-ADAPTABLE-CLASS-B-2.png)
![](https://www.infrastructureproducts.com.au/wp-content/uploads/2022/05/50201069-PIT-CONCRETE-TELSTRA-C8-CLASS-B-2.png)
![](https://www.infrastructureproducts.com.au/wp-content/uploads/2022/05/50201474-PIT-CONCRETE-MANHOLE-PF4TF-2-1.png)
![](https://www.infrastructureproducts.com.au/wp-content/uploads/2022/05/50201478-PIT-CONCRETE-MANHOLE-PF12TF-CLASS-D-2-2.png)
![](https://www.infrastructureproducts.com.au/wp-content/uploads/2022/07/50206580w.png)
![](https://www.infrastructureproducts.com.au/wp-content/uploads/2022/05/50201114-AX-S™-DIA390mm-COVER-COMPOSITE-SMART-ELECTRICAL-CLASS-B.png)
![](https://www.infrastructureproducts.com.au/wp-content/uploads/2023/11/50207738.png)
![](https://www.infrastructureproducts.com.au/wp-content/uploads/2023/10/50207593-KERB-UNIT-INTAKE-COUNCIL-SLIMLINE-LIL-SAG-2400mm.png)
![](https://www.infrastructureproducts.com.au/wp-content/uploads/2023/10/50207592-Kerb-Unit-Intake-Council-Slimline-LIL-Right-Hand-2400mm.png)
![](https://www.infrastructureproducts.com.au/wp-content/uploads/2023/10/50207591-KERB-UNIT-INTAKE-COUNCIL-SLIMLINE-LIL-LEFT-HAND-2400mm.png)
![](https://www.infrastructureproducts.com.au/wp-content/uploads/2023/10/5011.png)
![](https://www.infrastructureproducts.com.au/wp-content/uploads/2023/10/5014.png)
![](https://www.infrastructureproducts.com.au/wp-content/uploads/2023/03/50203069-FAST-TRENCH-AND-GRATE-4200x600-CLASS-G.png)
![](https://www.infrastructureproducts.com.au/wp-content/uploads/2022/10/50207424.png)
![](https://www.infrastructureproducts.com.au/wp-content/uploads/2022/10/50207425.png)
![](https://www.infrastructureproducts.com.au/wp-content/uploads/2022/10/50207426-1.png)
![](https://www.infrastructureproducts.com.au/wp-content/uploads/2023/03/50207427-ENCASEMENT-SOLID-1000x1000x250-WITH-600x600-1-PART-WITH-RMS-BRASS-TAG-ELEC-CLASS-D.png)
![](https://www.infrastructureproducts.com.au/wp-content/uploads/2022/10/50207428-1.png)
![](https://www.infrastructureproducts.com.au/wp-content/uploads/2022/10/50207429-1.png)
![](https://www.infrastructureproducts.com.au/wp-content/uploads/2022/09/50201650-PIT-CONCRETE-900x900x900x100mm-REBATE-STORM-WATER-CLASS-D.png)
![](https://www.infrastructureproducts.com.au/wp-content/uploads/2022/09/50201625-PIT-CONCRETE-450x450x450x100mm-REBATE-STORM-WATER-CLASS-D.png)
![](https://www.infrastructureproducts.com.au/wp-content/uploads/2022/09/50201626-PIT-CONCRETE-450x450x600x100mm-REBATE-STORM-WATER-CLASS-D.png)
![](https://www.infrastructureproducts.com.au/wp-content/uploads/2022/09/50201647-PIT-CONCRETE-900x900x600x100mm-REBATE-STORM-WATER-CLASS-Df.png)
![](https://www.infrastructureproducts.com.au/wp-content/uploads/2022/09/50201642-PIT-CONCRETE-900x600x600x100mm-REBATE-STORM-WATER-CLASS-Df.png)
![](https://www.infrastructureproducts.com.au/wp-content/uploads/2023/12/50201644.png)
![](https://www.infrastructureproducts.com.au/wp-content/uploads/2022/09/50201249.png)
![](https://www.infrastructureproducts.com.au/wp-content/uploads/2022/09/50201635-600x600x900-STORMWATER-PITd.png)
![](https://www.infrastructureproducts.com.au/wp-content/uploads/2022/08/50202461-MULTIduct™-4-WAY-SOCKET-END-CAP.png)
![](https://www.infrastructureproducts.com.au/wp-content/uploads/2022/08/50201117-STAKKAbox™-ULTIMA-Connect-CORNER-RIGHT-400mm-3.png)
![](https://www.infrastructureproducts.com.au/wp-content/uploads/2022/08/50201763.png)
![](https://www.infrastructureproducts.com.au/wp-content/uploads/2022/08/50201632-PIT-CONCRETE-600x600x600mm-REBATE-STORMe.png)
![](https://www.infrastructureproducts.com.au/wp-content/uploads/2022/08/50201408-AX-S™-COVER-GMS-TO-SUIT-1500x1500-OPENING-CLASS-C.png)
![](https://www.infrastructureproducts.com.au/wp-content/uploads/2022/08/50202323-LOCATION-CASE-QLD-RAIL-DOUBLE-WIDTHw.png)
![](https://www.infrastructureproducts.com.au/wp-content/uploads/2022/08/50202322-LOCATION-CASE-QLD-RAIL-SINGLE-WIDTHf.png)
![](https://www.infrastructureproducts.com.au/wp-content/uploads/2022/08/50202436.png)
![](https://www.infrastructureproducts.com.au/wp-content/uploads/2022/08/50202455-1.png)
![](https://www.infrastructureproducts.com.au/wp-content/uploads/2022/08/50202563r.png)
![](https://www.infrastructureproducts.com.au/wp-content/uploads/2022/08/50201721-PIT-CONCRETE-BELLTOP-1100x900x1050-NSW-RAIL-CLASS-Ds.png)
![](https://www.infrastructureproducts.com.au/wp-content/uploads/2022/08/50202033-COVER-AND-FRAME-600x600-FORTRESS-CLASS-B.png)
![](https://www.infrastructureproducts.com.au/wp-content/uploads/2022/08/50204499-GRATE-AND-FRAME-GMS-450x450-CLASS-A-GSG66A.png)
![](https://www.infrastructureproducts.com.au/wp-content/uploads/2022/08/50204488-GRATE-AND-FRAME-GMS-450x450-CLASS-A-GSG44A.png)
![](https://www.infrastructureproducts.com.au/wp-content/uploads/2022/08/50204474-GRATE-AND-FRAME-GMS-1200x1200-CLASS-D-M1212D-A-1.png)
![](https://www.infrastructureproducts.com.au/wp-content/uploads/2023/08/50204473-GRATE-AND-FRAME-GMS-1200x1200-CLASS-Bw.png)
![](https://www.infrastructureproducts.com.au/wp-content/uploads/2022/08/50204472-GRATE-AND-FRAME-GMS-1200x1200-CLASS-A.png)
![](https://www.infrastructureproducts.com.au/wp-content/uploads/2023/10/50204072-COVER-AND-FRAME-SOLID-450x450-1-PART-CLASS-D-CRS44D.png)
![](https://www.infrastructureproducts.com.au/wp-content/uploads/2023/07/50202839-COVER-AND-FRAME-INFILL-450x450-1-PART-CLASS-D.png)
![](https://www.infrastructureproducts.com.au/wp-content/uploads/2022/08/50206690-MULTIduct™-6-WAY-45-DEG-BEND-HORIZONTALw.png)
![](https://www.infrastructureproducts.com.au/wp-content/uploads/2022/08/50206689-MULTIduct™-6-WAY-45-DEG-BEND-VERTICALw.png)
![](https://www.infrastructureproducts.com.au/wp-content/uploads/2022/08/50201756-MULTIduct™-9-WAY-MITRE-3-DEG-BEND.png)
![](https://www.infrastructureproducts.com.au/wp-content/uploads/2022/08/50201755-MULTIduct™-6-WAY-MITRE-3-DEG-BENDf.png)
![](https://www.infrastructureproducts.com.au/wp-content/uploads/2022/08/50201754-MULTIduct™-4-WAYXL-MITRE-3-DEG-BENDf.png)
![](https://www.infrastructureproducts.com.au/wp-content/uploads/2022/08/50201753-MULTIduct™-4-WAY-MITRE-3-DEG-BENDe.png)
![](https://www.infrastructureproducts.com.au/wp-content/uploads/2022/08/50201751-MULTIduct™-6-WAY-22.5-BEND-VERTICAL-1.png)
![](https://www.infrastructureproducts.com.au/wp-content/uploads/2022/08/50201751-MULTIduct™-6-WAY-22.5-BEND-VERTICAL.png)
![](https://www.infrastructureproducts.com.au/wp-content/uploads/2022/08/50201750-MULTIduct™-9-WAY-22.5-BEND-XLf.png)
![](https://www.infrastructureproducts.com.au/wp-content/uploads/2022/08/50201749-MULTIduct™-9-WAY-SPIGOT-END-CAP.png)
![](https://www.infrastructureproducts.com.au/wp-content/uploads/2022/08/50201748-MULTIduct™-9-WAY-SOCKET-CAP.png)
![](https://www.infrastructureproducts.com.au/wp-content/uploads/2022/08/50201747-MULTIduct™-6-WAY-SPIGOT-END-CAP.png)
![](https://www.infrastructureproducts.com.au/wp-content/uploads/2022/08/50201744-MULTIduct™-4-WAYXL-SPIGOT-END-CAP.png)
![](https://www.infrastructureproducts.com.au/wp-content/uploads/2022/08/50201742-MULTIduct™-4-WAY-DOUBLE-SOCKET.png)
![](https://www.infrastructureproducts.com.au/wp-content/uploads/2022/08/50201741-MULTIduct™-9-WAY-DOUBLE-SPIGOT.png)
![](https://www.infrastructureproducts.com.au/wp-content/uploads/2022/08/50201740-MULTIduct™-9-WAY-DOUBLE-SOCKETd.png)
![](https://www.infrastructureproducts.com.au/wp-content/uploads/2022/08/50201739-MULTIduct™-6-WAY-DOUBLE-SPIGOTd.png)
![](https://www.infrastructureproducts.com.au/wp-content/uploads/2022/08/50201738-MULTIduct™-6-WAY-DOUBLE-SOCKET.png)
![](https://www.infrastructureproducts.com.au/wp-content/uploads/2022/08/50201735-MULTIduct™-4-WAY-CLIPLESS-DOUBLE-SPIG-ATT24.0-BK-XL.png)
![](https://www.infrastructureproducts.com.au/wp-content/uploads/2022/08/50201734-MULTIduct™-4-WAY-CLIPLESS-DOUBLE-SPIG-ATT24.0-BK.png)
![](https://www.infrastructureproducts.com.au/wp-content/uploads/2022/08/50201733-MULTIduct™-9-WAY-SINGLE-DUCT-ADPAPTOR.png)
![](https://www.infrastructureproducts.com.au/wp-content/uploads/2022/08/50201732-MULTIduct™-6-WAY-SINGLE-DUCT-ADPAPTORd.png)
![](https://www.infrastructureproducts.com.au/wp-content/uploads/2022/08/50207044-FLOOR-TO-SUIT-ULTIMA-HYBRID-PF20-PIT.png)
![](https://www.infrastructureproducts.com.au/wp-content/uploads/2022/08/50204916-SLEEPER-INTERMEDIATE-ULTIMA-1200mm.png)
![](https://www.infrastructureproducts.com.au/wp-content/uploads/2022/08/50204913.png)
![](https://www.infrastructureproducts.com.au/wp-content/uploads/2022/08/50204909-SLEEPER-COLLAR-1400mm-TO-SUIT-4-PART-–-PART-B.png)
![](https://www.infrastructureproducts.com.au/wp-content/uploads/2022/08/50204908-SLEEPER-COLLAR-1200mm-TO-SUIT-2-PART-–-PART-B.png)
![](https://www.infrastructureproducts.com.au/wp-content/uploads/2022/08/50204309-SLEEPER-COLLAR-1200mm-TO-SUIT-2-PART-–-PART-A.png)
![](https://www.infrastructureproducts.com.au/wp-content/uploads/2022/08/50204308-SLEEPER-INTERMEDIATE-ULTIMA-1400mm.png)
![](https://www.infrastructureproducts.com.au/wp-content/uploads/2022/08/50203768-PIT-ULTIMA-HYBRID-ASSEMBLY-TYPE-B-2.png)
![](https://www.infrastructureproducts.com.au/wp-content/uploads/2023/10/50203767.png)
![](https://www.infrastructureproducts.com.au/wp-content/uploads/2022/08/50203766-PIT-ULTIMA-HYBRID-ASSEMBLY-PF20-2.png)
![](https://www.infrastructureproducts.com.au/wp-content/uploads/2023/10/50203765-PIT-ULTIMA-HYBRID-ASSEMBLY-PF12fs.png)
![](https://www.infrastructureproducts.com.au/wp-content/uploads/2023/10/50203764-PIT-ULTIMA-HYBRID-ASSEMBLY-PF4-2.png)
![](https://www.infrastructureproducts.com.au/wp-content/uploads/2022/08/50202450-SLEEPER-INTERMEDIATE-ULTIMA-1800mm.png)
![](https://www.infrastructureproducts.com.au/wp-content/uploads/2022/08/50202449-SLEEPER-COLLAR-1400mm-TO-SUIT-4-PART-–-PART-A.png)
![](https://www.infrastructureproducts.com.au/wp-content/uploads/2022/08/50202036-2500MM-RETAINING-PLATE.png)
![](https://www.infrastructureproducts.com.au/wp-content/uploads/2022/08/50202035-ULTIMA-PULTRUTION-PLATE-SECURING-3.png)
![](https://www.infrastructureproducts.com.au/wp-content/uploads/2022/08/50201762-STAKKAbox™-FORTRESS-445xD150.png)
![](https://www.infrastructureproducts.com.au/wp-content/uploads/2022/08/50201143-STAKKAbox™-ULTIMA-Connect-CORNER-RIGHT-1500mm-2.png)
![](https://www.infrastructureproducts.com.au/wp-content/uploads/2022/08/50201141-STAKKAbox™-ULTIMA-Connect-CORNER-RIGHT-600mm.png)
![](https://www.infrastructureproducts.com.au/wp-content/uploads/2022/08/50201142-STAKKAbox™-ULTIMA-Connect-CORNER-RIGHT-675mm-2-1.png)
![](https://www.infrastructureproducts.com.au/wp-content/uploads/2022/08/50201136-STAKKAbox™-ULTIMA-Connect-SIDEWALL-600mm-2.png)
![](https://www.infrastructureproducts.com.au/wp-content/uploads/2022/08/50201135-STAKKAbox™-ULTIMA-Connect-SIDEWALL-500mm-2.png)
![](https://www.infrastructureproducts.com.au/wp-content/uploads/2022/08/50201134-STAKKAbox™-ULTIMA-Connect-SIDEWALL-1000mm-2.png)
![](https://www.infrastructureproducts.com.au/wp-content/uploads/2022/08/50201132-STAKKAbox™-ULTIMA-Connect-CORNER-RIGHT-1900mm-2.png)
![](https://www.infrastructureproducts.com.au/wp-content/uploads/2022/08/50201131-STAKKAbox™-ULTIMA-Connect-CORNER-LEFT-1900mm-2.png)
![](https://www.infrastructureproducts.com.au/wp-content/uploads/2022/08/50201130-STAKKAbox™-ULTIMA-Connect-CORNER-LEFT-1500mm-2.png)
![](https://www.infrastructureproducts.com.au/wp-content/uploads/2022/08/50201129-STAKKAbox™-ULTIMA-Connect-CORNER-RIGHT-1200mm-2.png)
![](https://www.infrastructureproducts.com.au/wp-content/uploads/2022/08/50201128-STAKKAbox™-ULTIMA-Connect-CORNER-LEFT-1200mm-2.png)
![](https://www.infrastructureproducts.com.au/wp-content/uploads/2022/08/50201127-STAKKAbox™-ULTIMA-Connect-CORNER-RIGHT-1000mm-2.png)
![](https://www.infrastructureproducts.com.au/wp-content/uploads/2022/08/50201126-STAKKAbox™-ULTIMA-Connect-CORNER-LEFT-1000mm-2-1.png)
![](https://www.infrastructureproducts.com.au/wp-content/uploads/2022/08/50201125-STAKKAbox™-ULTIMA-Connect-CORNER-RIGHT-900mm-2.png)
![](https://www.infrastructureproducts.com.au/wp-content/uploads/2022/08/50201124-STAKKAbox™-ULTIMA-Connect-CORNER-LEFT-900mm-2-1.png)
![](https://www.infrastructureproducts.com.au/wp-content/uploads/2022/08/50201123-STAKKAbox™-ULTIMA-Connect-CORNER-RIGHT-800mm-2.png)
![](https://www.infrastructureproducts.com.au/wp-content/uploads/2022/08/50201122-STAKKAbox™-ULTIMA-Connect-CORNER-LEFT-800mm-2.png)
![](https://www.infrastructureproducts.com.au/wp-content/uploads/2022/08/50201121-STAKKAbox™-ULTIMA-Connect-CORNER-RIGHT-750mm-2.png)
![](https://www.infrastructureproducts.com.au/wp-content/uploads/2022/08/50201120-STAKKAbox™-ULTIMA-Connect-CORNER-LEFT-750mm-2.png)
![](https://www.infrastructureproducts.com.au/wp-content/uploads/2022/08/50201119-STAKKAbox™-ULTIMA-Connect-CORNER-LEFT-675mm-2.png)
![](https://www.infrastructureproducts.com.au/wp-content/uploads/2022/08/50201118-STAKKAbox™-ULTIMA-Connect-CORNER-LEFT-600mm-2.png)
![](https://www.infrastructureproducts.com.au/wp-content/uploads/2022/08/50201116-STAKKAbox™-ULTIMA-Connect-CORNER-LEFT-400mm-2-1.png)
![](https://www.infrastructureproducts.com.au/wp-content/uploads/2022/07/50201515-FLOOR-CONCRETE-TO-SUIT-1000x1000-PIT.png)
![](https://www.infrastructureproducts.com.au/wp-content/uploads/2022/07/50202790-PIT-CONCRETE-BELLTOP-1100x900x1050-NO-FLOOR-WITH-4-BLOCKOUTS-CLASS-D.png)
![](https://www.infrastructureproducts.com.au/wp-content/uploads/2022/07/50201723.png)
![](https://www.infrastructureproducts.com.au/wp-content/uploads/2022/07/50201420-AX-S™-P13-COVER-CONCRETE-COM-CAB-CLASS-A.png)
![](https://www.infrastructureproducts.com.au/wp-content/uploads/2022/07/50206397-P8-PIT-4-PITS-PER-PALLETv.png)
![](https://www.infrastructureproducts.com.au/wp-content/uploads/2022/07/50201807-HS5-RING-AND-UTILITY-BASE-MIX-KIT-2.png)
![](https://www.infrastructureproducts.com.au/wp-content/uploads/2022/07/50201091-ASSEMBLY-MANHOLE-FRAME-AND-COVER-2-PART-3-2.png)
![](https://www.infrastructureproducts.com.au/wp-content/uploads/2022/06/50201216-RAILDUCT-T-PIECE-RIGHT-BLACK-2.png)
![](https://www.infrastructureproducts.com.au/wp-content/uploads/2022/06/50201216-RAILDUCT-T-PIECE-RIGHT-BLACK.png)
![](https://www.infrastructureproducts.com.au/wp-content/uploads/2022/06/50201211-RAILduct™-STRAIGHTs.png)
![](https://www.infrastructureproducts.com.au/wp-content/uploads/2022/06/50204349-STAKKAbox™-Fortress-HS6-NO-GASKETS-OR-COVERd.png)
![](https://www.infrastructureproducts.com.au/wp-content/uploads/2022/06/50207046-LIFTING-PIN-ASSEMBLY-2x-PINS-3.2T.png)
![](https://www.infrastructureproducts.com.au/wp-content/uploads/2022/06/50203569-LADDER-MANHOLE-TELSTRA-APPOVED-2400mm-CW-BRACKET.png)
![](https://www.infrastructureproducts.com.au/wp-content/uploads/2022/06/50206798-DRIVEABLE-ENDWALL-900DIA.png)
![](https://www.infrastructureproducts.com.au/wp-content/uploads/2022/06/50206797-DRIVEABLE-ENDWALL-825DIA.png)
![](https://www.infrastructureproducts.com.au/wp-content/uploads/2022/06/50206796-DRIVEABLE-ENDWALL-750DIA.png)
![](https://www.infrastructureproducts.com.au/wp-content/uploads/2022/06/50206795-DRIVEABLE-ENDWALL-675DIA-2.png)
![](https://www.infrastructureproducts.com.au/wp-content/uploads/2022/06/50206794-DRIVEABLE-ENDWALL-600DIA.png)
![](https://www.infrastructureproducts.com.au/wp-content/uploads/2022/06/50206583-COVER-AND-FRAME-GMS-INFILL-450x450-CLASS-B.png)
![](https://www.infrastructureproducts.com.au/wp-content/uploads/2022/06/50206581-COVER-AND-FRAME-GMS-SOLID-TOP-450x450-CLASS-B.png)
![](https://www.infrastructureproducts.com.au/wp-content/uploads/2022/06/50204870-ENCASEMENT-800x800x200-TO-SUIT-C5-SL2-CLASS-D.png)
![](https://www.infrastructureproducts.com.au/wp-content/uploads/2022/06/50201471-AX-S™-P6-COVER-CONCRETE-FIBREPATH-CLASS-A.png)
![](https://www.infrastructureproducts.com.au/wp-content/uploads/2022/06/50206587-COVER-AND-FRAME-GMS-INFILL-600x450-CLASS-B.png)
![](https://www.infrastructureproducts.com.au/wp-content/uploads/2022/06/50206585-COVER-AND-FRAME-GMS-SOLID-TOP-600x450-CLASS-B.png)
![](https://www.infrastructureproducts.com.au/wp-content/uploads/2022/06/50205387-DRIVEABLE-ENDWALL-525DIA.png)
![](https://www.infrastructureproducts.com.au/wp-content/uploads/2022/06/50201457-AX-S™-P6-COVER-CONCRETE-FIBRE-VISION-CLASS-A.png)
![](https://www.infrastructureproducts.com.au/wp-content/uploads/2022/06/50201451-AX-S™-P5-COVER-CONCRETE-UECOMM-CLASS-A.png)
![](https://www.infrastructureproducts.com.au/wp-content/uploads/2022/06/50201446-AX-S™-P5-COVER-CONCRETE-OPTUS-CLASS-A.png)
![](https://www.infrastructureproducts.com.au/wp-content/uploads/2022/05/50207209-LINK-SLAB-TMR-2400-2A-2400mm-NOMINAL-LENGTH.png)
![](https://www.infrastructureproducts.com.au/wp-content/uploads/2022/05/50206350-COVER-AND-FRAME-GMS-SOLID-TOP-600x600-CLASS-D.png)
![](https://www.infrastructureproducts.com.au/wp-content/uploads/2022/05/50207216-BASE-SLAB-TMR-1500-2A-1200mm-NOMINAL-LENGTH.png)
![](https://www.infrastructureproducts.com.au/wp-content/uploads/2022/05/50207222-BASE-SLAB-TMR-2400-2A-1200mm-NOMINAL-LENGTH.png)
![](https://www.infrastructureproducts.com.au/wp-content/uploads/2022/12/50202849-COVER-AND-FRAME-INFILL-900x900-1-PART-CLASS-D-CRI99D.png)
![](https://www.infrastructureproducts.com.au/wp-content/uploads/2022/05/50207214.png)
![](https://www.infrastructureproducts.com.au/wp-content/uploads/2022/05/50206942-PIT-CONCRETE-BELLTOP-8-DEFENCE-KO-CLASS-D-2.png)
![](https://www.infrastructureproducts.com.au/wp-content/uploads/2022/05/50207221-BASE-SLAB-TMR-2100-2A-2400mm-NOMINAL-LENGTH.png)
![](https://www.infrastructureproducts.com.au/wp-content/uploads/2022/05/50201081-COVER-LIFTING-KEY-MANHOLE-WITH-BOLT-750mm.png)
![](https://www.infrastructureproducts.com.au/wp-content/uploads/2022/05/50202853-COVER-AND-FRAME-SOLID-600x600-1-PART-CLASS-D.png)
![](https://www.infrastructureproducts.com.au/wp-content/uploads/2022/05/50203763-PIT-CONCRETE-BELLTOP-1100x900x1050-DEFENCE-8-x-KO-PER-FACE-CLASS-Dw.png)
![](https://www.infrastructureproducts.com.au/wp-content/uploads/2022/05/50202846-COVER-AND-FRAME-INFILL-900x600-1-PART-CLASS-D-CRI96D.png)
![](https://www.infrastructureproducts.com.au/wp-content/uploads/2022/05/argsevd.2585.png)
![](https://www.infrastructureproducts.com.au/wp-content/uploads/2022/05/50206349-COVER-AND-FRAME-GMS-SOLID-TOP-900x600-CLASS-Bd.png)
![](https://www.infrastructureproducts.com.au/wp-content/uploads/2022/05/50201373-guard-goal-post-set-–-2x-posts-2x-bases-1x-flags.png)
![](https://www.infrastructureproducts.com.au/wp-content/uploads/2022/05/50202842-COVER-AND-FRAME-INFILL-600x600-1-PART-CLASS-D-CRI66D.png)
![](https://www.infrastructureproducts.com.au/wp-content/uploads/2022/05/50207215.png)
![](https://www.infrastructureproducts.com.au/wp-content/uploads/2022/05/50207217-BASE-SLAB-TMR-1500-2A-2400mm-NOMINAL-LENGTH.png)
![](https://www.infrastructureproducts.com.au/wp-content/uploads/2022/05/50206351-COVER-AND-FRAME-GMS-SOLID-TOP-900x600-CLASS-D.png)
![](https://www.infrastructureproducts.com.au/wp-content/uploads/2022/05/50207223-BASE-SLAB-TMR-2400-2A-2400mm-NOMINAL-LENGTH.png)
![](https://www.infrastructureproducts.com.au/wp-content/uploads/2022/05/50207220-BASE-SLAB-TMR-2100-2A-1200mm-NOMINAL-LENGTH.png)
![](https://www.infrastructureproducts.com.au/wp-content/uploads/2022/05/50204351-PIT-CONCRETE-445x445x1000x100mm-WITH-4-OFF-KO-PER-WALL-CLASS-D-AUSPITS-2.png)
![](https://www.infrastructureproducts.com.au/wp-content/uploads/2022/05/50207218-BASE-SLAB-TMR-1800-2A-1200mm-NOMINAL-LENGTH.png)
![](https://www.infrastructureproducts.com.au/wp-content/uploads/2022/05/50207210.png)
![](https://www.infrastructureproducts.com.au/wp-content/uploads/2022/05/50207212.png)
![](https://www.infrastructureproducts.com.au/wp-content/uploads/2022/05/50207206-LINK-SLAB-TMR-2100-2A-1200mm-NOMINAL-LENGTH.png)
![](https://www.infrastructureproducts.com.au/wp-content/uploads/2022/05/50207203-LINK-SLAB-TMR-1500-2A-2400mm-NOMINAL-LENGTH.png)
![](https://www.infrastructureproducts.com.au/wp-content/uploads/2022/05/50207204-LINK-SLAB-TMR-1800-2A-1200mm-NOMINAL-LENGTH.png)
![](https://www.infrastructureproducts.com.au/wp-content/uploads/2022/05/50207207-LINK-SLAB-TMR-2100-2A-2400mm-NOMINAL-LENGTH.png)
![](https://www.infrastructureproducts.com.au/wp-content/uploads/2022/05/50207205-LINK-SLAB-TMR-1800-2A-2400mm-NOMINAL-LENGTH.png)
![](https://www.infrastructureproducts.com.au/wp-content/uploads/2022/05/50207213.png)
![](https://www.infrastructureproducts.com.au/wp-content/uploads/2022/05/50207201-LINK-SLAB-TMR-1200-2A-2400mm-NOMINAL-LENGTH.png)
![](https://www.infrastructureproducts.com.au/wp-content/uploads/2022/05/50207219-BASE-SLAB-TMR-1800-2A-2400mm-NOMINAL-LENGTH.png)
![](https://www.infrastructureproducts.com.au/wp-content/uploads/2022/05/50207202-LINK-SLAB-TMR-1500-2A-1200mm-NOMINAL-LENGTH.png)
![](https://www.infrastructureproducts.com.au/wp-content/uploads/2022/05/50207208-LINK-SLAB-TMR-2400-2A-1200mm-NOMINAL-LENGTH.png)
![](https://www.infrastructureproducts.com.au/wp-content/uploads/2022/05/50207192-BOX-CULVERT-TMR-2400x900-2A-1200mm-NOMINAL-LENGTH.png)
![](https://www.infrastructureproducts.com.au/wp-content/uploads/2022/05/50207193-BOX-CULVERT-TMR-2400x900-2A-2400mm-NOMINAL-LENGTH-1.png)
![](https://www.infrastructureproducts.com.au/wp-content/uploads/2022/05/50207194-BOX-CULVERT-TMR-2400x1200-2A-1200mm-NOMINAL-LENGTH.png)
![](https://www.infrastructureproducts.com.au/wp-content/uploads/2022/05/50207195-BOX-CULVERT-TMR-2400x1200-2A-2400mm-NOMINAL-LENGTH-1.png)
![](https://www.infrastructureproducts.com.au/wp-content/uploads/2022/05/50207211.png)
![](https://www.infrastructureproducts.com.au/wp-content/uploads/2022/05/50207198.png)
![](https://www.infrastructureproducts.com.au/wp-content/uploads/2022/05/50207199.png)
![](https://www.infrastructureproducts.com.au/wp-content/uploads/2022/05/50207186.png)
![](https://www.infrastructureproducts.com.au/wp-content/uploads/2022/05/50207187-BOX-CULVERT-TMR-2100x1200-2A-2400mm-NOMINAL-LENGTH.png)
![](https://www.infrastructureproducts.com.au/wp-content/uploads/2022/05/50207190-BOX-CULVERT-TMR-2400x750-2A-1200mm-NOMINAL-LENGTH.png)
![](https://www.infrastructureproducts.com.au/wp-content/uploads/2022/05/50207181-BOX-CULVERT-TMR-2100x600-2A-2400mm-NOMINAL-LENGTH.png)
![](https://www.infrastructureproducts.com.au/wp-content/uploads/2022/05/50207182.png)
![](https://www.infrastructureproducts.com.au/wp-content/uploads/2022/05/50207185-BOX-CULVERT-TMR-2100x900-2A-2400mm-NOMINAL-LENGTH.png)
![](https://www.infrastructureproducts.com.au/wp-content/uploads/2022/05/50207188-BOX-CULVERT-TMR-2400x600-2A-1200mm-NOMINAL-LENGTH-1.png)
![](https://www.infrastructureproducts.com.au/wp-content/uploads/2022/05/50207189-BOX-CULVERT-TMR-2400x600-2A-2400mm-NOMINAL-LENGTH-1.png)
![](https://www.infrastructureproducts.com.au/wp-content/uploads/2022/05/50207175-BOX-CULVERT-TMR-1800x750-2A-2400mm-NOMINAL-LENGTH.png)
![](https://www.infrastructureproducts.com.au/wp-content/uploads/2022/05/50207183-BOX-CULVERT-TMR-2100x750-2A-2400mm-NOMINAL-LENGTH.png)
![](https://www.infrastructureproducts.com.au/wp-content/uploads/2022/05/50207184.png)
![](https://www.infrastructureproducts.com.au/wp-content/uploads/2022/05/50207179-BOX-CULVERT-TMR-1800x1200-2A-2400mm-NOMINAL-LENGTH.png)
![](https://www.infrastructureproducts.com.au/wp-content/uploads/2022/05/50207180.png)
![](https://www.infrastructureproducts.com.au/wp-content/uploads/2022/05/50207167-BOX-CULVERT-TMR-1500x750-2A-2400mm-NOMINAL-LENGTH.png)
![](https://www.infrastructureproducts.com.au/wp-content/uploads/2022/05/50207169-BOX-CULVERT-TMR-1500x900-2A-2400mm-NOMINAL-LENGTH.png)
![](https://www.infrastructureproducts.com.au/wp-content/uploads/2022/05/50207172-BOX-CULVERT-TMR-1800x600-2A-1200mm-NOMINAL-LENGTH.png)
![](https://www.infrastructureproducts.com.au/wp-content/uploads/2022/07/50207174-BOX-CULVERT-TMR-1800x750-2A-1200mm-NOMINAL-LENGTH.png)
![](https://www.infrastructureproducts.com.au/wp-content/uploads/2022/05/50207173-BOX-CULVERT-TMR-1800x600-2A-2400mm-NOMINAL-LENGTH-1.png)
![](https://www.infrastructureproducts.com.au/wp-content/uploads/2022/05/50207170-BOX-CULVERT-TMR-1500x1200-2A-1200mm-NOMINAL-LENGTH.png)
![](https://www.infrastructureproducts.com.au/wp-content/uploads/2022/05/50207164-BOX-CULVERT-TMR-1500x600-2A-1200mm-NOMINAL-LENGTH.png)
![](https://www.infrastructureproducts.com.au/wp-content/uploads/2022/05/50207168-BOX-CULVERT-TMR-1500x900-2A-1200mm-NOMINAL-LENGTH.png)
![](https://www.infrastructureproducts.com.au/wp-content/uploads/2022/05/50207171-BOX-CULVERT-TMR-1500x1200-2A-2400mm-NOMINAL-LENGTH.png)
![](https://www.infrastructureproducts.com.au/wp-content/uploads/2022/05/50207166-BOX-CULVERT-TMR-1500x750-2A-1200mm-NOMINAL-LENGTH.png)
![](https://www.infrastructureproducts.com.au/wp-content/uploads/2022/05/50207178-BOX-CULVERT-TMR-1800x1200-2A-1200mm-NOMINAL-LENGTH.png)
![](https://www.infrastructureproducts.com.au/wp-content/uploads/2022/05/50207157.png)
![](https://www.infrastructureproducts.com.au/wp-content/uploads/2022/05/50207158.png)
![](https://www.infrastructureproducts.com.au/wp-content/uploads/2022/05/50207159r.png)
![](https://www.infrastructureproducts.com.au/wp-content/uploads/2022/05/50207162.png)
![](https://www.infrastructureproducts.com.au/wp-content/uploads/2022/05/50207165-BOX-CULVERT-TMR-1500x600-2A-2400mm-NOMINAL-LENGTH.png)
![](https://www.infrastructureproducts.com.au/wp-content/uploads/2022/05/50207154.png)
![](https://www.infrastructureproducts.com.au/wp-content/uploads/2022/05/50207160.png)
![](https://www.infrastructureproducts.com.au/wp-content/uploads/2023/04/50207176-BOX-CULVERT-TMR-1800x900-2A-1200mm-NOMINAL-LENGTH.png)
![](https://www.infrastructureproducts.com.au/wp-content/uploads/2022/05/50207177-BOX-CULVERT-TMR-1800x900-2A-2400mm-NOMINAL-LENGTH-1.png)
![](https://www.infrastructureproducts.com.au/wp-content/uploads/2022/05/50207161.png)
![](https://www.infrastructureproducts.com.au/wp-content/uploads/2022/05/50207150.png)
![](https://www.infrastructureproducts.com.au/wp-content/uploads/2022/05/50207155.png)
![](https://www.infrastructureproducts.com.au/wp-content/uploads/2022/05/50207156.png)
![](https://www.infrastructureproducts.com.au/wp-content/uploads/2022/05/50207163.png)
![](https://www.infrastructureproducts.com.au/wp-content/uploads/2022/05/50207143.png)
![](https://www.infrastructureproducts.com.au/wp-content/uploads/2022/05/50207149.png)
![](https://www.infrastructureproducts.com.au/wp-content/uploads/2022/05/50207151.png)
![](https://www.infrastructureproducts.com.au/wp-content/uploads/2022/05/50207152.png)
![](https://www.infrastructureproducts.com.au/wp-content/uploads/2022/05/50207153.png)
![](https://www.infrastructureproducts.com.au/wp-content/uploads/2022/05/50207140.png)
![](https://www.infrastructureproducts.com.au/wp-content/uploads/2022/05/50207142.png)
![](https://www.infrastructureproducts.com.au/wp-content/uploads/2022/05/50207144.png)
![](https://www.infrastructureproducts.com.au/wp-content/uploads/2022/05/50207145.png)
![](https://www.infrastructureproducts.com.au/wp-content/uploads/2022/05/50207146-BOX-CULVERT-TMR-900x600-2A-1200mm-NOMINAL-LENGTH.png)
![](https://www.infrastructureproducts.com.au/wp-content/uploads/2022/05/50207141.png)
![](https://www.infrastructureproducts.com.au/wp-content/uploads/2022/05/50207137.png)
![](https://www.infrastructureproducts.com.au/wp-content/uploads/2022/05/50207138.png)
![](https://www.infrastructureproducts.com.au/wp-content/uploads/2022/05/50207191-BOX-CULVERT-TMR-2400x750-2A-2400mm-NOMINAL-LENGTH-1.png)
![](https://www.infrastructureproducts.com.au/wp-content/uploads/2022/05/50207196.png)
![](https://www.infrastructureproducts.com.au/wp-content/uploads/2022/05/50207197.png)
![](https://www.infrastructureproducts.com.au/wp-content/uploads/2022/05/50207200-LINK-SLAB-TMR-1200-2A-1200mm-NOMINAL-LENGTH.png)
![](https://www.infrastructureproducts.com.au/wp-content/uploads/2022/05/50207139.png)
![](https://www.infrastructureproducts.com.au/wp-content/uploads/2022/05/50207147.png)
![](https://www.infrastructureproducts.com.au/wp-content/uploads/2022/05/50207148.png)
![](https://www.infrastructureproducts.com.au/wp-content/uploads/2022/05/50204848-COVER-AND-FRAME-GMS-INFILL-900x600-CLASS-D.png)
![](https://www.infrastructureproducts.com.au/wp-content/uploads/2022/05/50204847-COVER-AND-FRAME-GMS-INFILL-900x600-CLASS-B.png)
![](https://www.infrastructureproducts.com.au/wp-content/uploads/2022/05/50207136.png)
![](https://www.infrastructureproducts.com.au/wp-content/uploads/2022/05/50204845-COVER-AND-FRAME-GMS-SOLID-900x900-CLASS-B-1.png)
![](https://www.infrastructureproducts.com.au/wp-content/uploads/2022/05/50204846-COVER-AND-FRAME-GMS-INFILL-900x900-CLASS-B.png)
![](https://www.infrastructureproducts.com.au/wp-content/uploads/2022/05/50204597-APRON-MGSG-STANDARD-1610x1740x250-DIAMOND-GRATE-AND-FRAME-RMS-CLASS-D.png)
![](https://www.infrastructureproducts.com.au/wp-content/uploads/2022/05/50204598-APRON-MGSG-DOUBLE-SAG-1610x1740x250-DIAMOND-GRATE-AND-FRAME-RMS.png)
![](https://www.infrastructureproducts.com.au/wp-content/uploads/2022/05/50204407-COVER-AND-FRAME-INFILL-900x1200-2-PART-T-PROFILE-CLASS-D.png)
![](https://www.infrastructureproducts.com.au/wp-content/uploads/2022/05/50202782-FLOOR-CONCRETE-TO-SUIT-BELLTOP-10.png)
![](https://www.infrastructureproducts.com.au/wp-content/uploads/2022/05/50202781-PIT-CONCRETE-BELLTOP-10-NO-FLOOR-WITH-2-BLOCKOUTS-CLASS-De.png)
![](https://www.infrastructureproducts.com.au/wp-content/uploads/2022/05/50202594-AX-S™-P7-COVER-CONCRETE-SIGNAL-COMMS-CLASS-A-1.png)
![](https://www.infrastructureproducts.com.au/wp-content/uploads/2022/05/50202487-RISER-CONCRETE-200mm-TO-SUIT-C5-SL2-COVER-2.png)
![](https://www.infrastructureproducts.com.au/wp-content/uploads/2022/05/50202489-RISER-CONCRETE-200mm-TO-SUIT-1100x900-PIT-SL2-COVER.png)
![](https://www.infrastructureproducts.com.au/wp-content/uploads/2022/05/50202338-C4-Split-Bodied-Pit-Brownfield-Cut-Over-Pit-2.png)
![](https://www.infrastructureproducts.com.au/wp-content/uploads/2022/05/50202340-RISER-CONCRETE-200mm-TO-SUIT-600x600-GMS-COVER.png)
![](https://www.infrastructureproducts.com.au/wp-content/uploads/2022/05/50202468-PIT-CONCRETE-MANHOLE-TURRET-450mmfd.png)
![](https://www.infrastructureproducts.com.au/wp-content/uploads/2022/05/50203502-PIT-CONCRETE-BELLTOP-8-SL2-CLASS-D-2.png)
![](https://www.infrastructureproducts.com.au/wp-content/uploads/2022/05/50203510-ENCASEMENT-1500x1500x200-WITH-SCEC-SL2-TO-SUIT-1100x900-OPENING-CLASS-D.png)
![](https://www.infrastructureproducts.com.au/wp-content/uploads/2022/05/50203220-PIT-CONCRETE-1000x1000x1200x90mm-NO-KNOCKOUTS-FLOOR-DRAIN-CLASS-Dw.png)
![](https://www.infrastructureproducts.com.au/wp-content/uploads/2022/05/50203503-PIT-CONCRETE-BELLTOP-5-SL2-CLASS-Ds.png)
![](https://www.infrastructureproducts.com.au/wp-content/uploads/2022/05/50203500-PIT-CONCRETE-BELLTOP-1100x900x1050-SL2-CLASS-D-2.png)
![](https://www.infrastructureproducts.com.au/wp-content/uploads/2022/05/50202310-ROADS-CORP-RING-RIBBED.png)
![](https://www.infrastructureproducts.com.au/wp-content/uploads/2022/05/50202311.png)
![](https://www.infrastructureproducts.com.au/wp-content/uploads/2022/05/50202309-AX-S™-SCEC-SL1-TO-SUIT-600X600-OPENING-COVER-GMS-BARRI-BOLT.png)
![](https://www.infrastructureproducts.com.au/wp-content/uploads/2022/05/50202308-AX-S™-SCEC-SL1-TO-SUIT-600X600-OPENING-COVER-GMS.png)
![](https://www.infrastructureproducts.com.au/wp-content/uploads/2022/05/50202015-AX-S™-DIA390-COVER-CONCRETE-DANGER-ELECTRICAL-CLASS-A.png)
![](https://www.infrastructureproducts.com.au/wp-content/uploads/2022/05/50202577-AX-S™-P5-COVER-COMPOSITE-SMART-WATER-CLASS-B.png)
![](https://www.infrastructureproducts.com.au/wp-content/uploads/2022/05/50202579-AX-S™-P5-COVER-COMPOSITE-SMART-AARNET-CLASS-B.png)
![](https://www.infrastructureproducts.com.au/wp-content/uploads/2022/05/50203551-AX-S™-P5-COVER-COMPOSITE-SMART-AUSSIE-BROADBAND-LOCK-ADAPT-CLASS-B.png)
![](https://www.infrastructureproducts.com.au/wp-content/uploads/2022/05/50202578-AX-S™-P5-COVER-COMPOSITE-SMART-WATER-LOCK-ADAPT-CLASS-B.png)
![](https://www.infrastructureproducts.com.au/wp-content/uploads/2022/05/50202571-AX-S™-P6-COVER-COMPOSITE-SMART-AARNET-CLASS-B.png)
![](https://www.infrastructureproducts.com.au/wp-content/uploads/2022/05/50202573-AX-S™-P5-COVER-COMPOSITE-SMART-COMMS-CLASS-B.png)
![](https://www.infrastructureproducts.com.au/wp-content/uploads/2022/05/50203550-AX-S™-P6-COVER-COMPOSITE-SMART-AUSSIE-BROADBAND-LOCK-ADAPT-CLASS-B.png)
![](https://www.infrastructureproducts.com.au/wp-content/uploads/2022/05/50202569-AX-S™-P6-COVER-COMPOSITE-SMART-WATER-CLASS-B.png)
![](https://www.infrastructureproducts.com.au/wp-content/uploads/2022/05/50202570-AX-S™-P6-COVER-COMPOSITE-SMART-WATER-LOCK-ADAPT-CLASS-B.png)
![](https://www.infrastructureproducts.com.au/wp-content/uploads/2022/05/50201942-LOGO-DIA80-STEPPED-SUIT-GMS-BLANK.png)
![](https://www.infrastructureproducts.com.au/wp-content/uploads/2023/10/50201911-LOGO-DIA80-STEPPED-SUIT-GMS-NEXTGEN.png)
![](https://www.infrastructureproducts.com.au/wp-content/uploads/2023/10/50201922-LOGO-DIA80-STEPPED-SUIT-GMS-AUS-NET-COMMS-2.png)
![](https://www.infrastructureproducts.com.au/wp-content/uploads/2023/10/50201918-LOGO-DIA80-STEPPED-SUIT-GMS-TELSTRAds.png)
![](https://www.infrastructureproducts.com.au/wp-content/uploads/2023/10/50201920-LOGO-DIA80-STEPPED-SUIT-GMS-AARNET-COMMS-2.png)
![](https://www.infrastructureproducts.com.au/wp-content/uploads/2022/05/50201994-AX-S™-SCEC-SL1-TO-SUIT-1100x900-OPENING-COVER-GMS-BARRI-BOLT-d.png)
![](https://www.infrastructureproducts.com.au/wp-content/uploads/2022/05/50201996-AX-S™-SCEC-SL2-TO-SUIT-1100x900-OPENING-COVER-GMS.png)
![](https://www.infrastructureproducts.com.au/wp-content/uploads/2022/05/50201992-AX-S™-SCEC-SL1-C2-COVER-GMS-BARRI-BOLT.png)
![](https://www.infrastructureproducts.com.au/wp-content/uploads/2022/05/50201664-RISER-CONCRETE-150mm-900x900x150x100mm-REBATEd.png)
![](https://www.infrastructureproducts.com.au/wp-content/uploads/2022/05/50201667-RISER-CONCRETE-300mm-900x900x300x100mm-REBATEd.png)
![](https://www.infrastructureproducts.com.au/wp-content/uploads/2022/05/50201669-RISER-CONCRETE-450mm-900x900x450x100mm-REBATEd.png)
![](https://www.infrastructureproducts.com.au/wp-content/uploads/2022/05/50201660-RISER-CONCRETE-450mm-900x600x450x100mm-REBATEf.png)
![](https://www.infrastructureproducts.com.au/wp-content/uploads/2022/05/50201662-RISER-CONCRETE-600mm-900x600x600x100mm-REBATEf.png)
![](https://www.infrastructureproducts.com.au/wp-content/uploads/2022/05/50201671-RISER-CONCRETE-600mm-900x900x600x100mm-REBATEd.png)
![](https://www.infrastructureproducts.com.au/wp-content/uploads/2022/05/50201659-RISER-CONCRETE-300mm-900x600x300x100mm-REBATEf.png)
![](https://www.infrastructureproducts.com.au/wp-content/uploads/2022/05/50201945-AX-S™-SCEC-SL1-C5-COVER-GMS-BARRI-BOLT.png)
![](https://www.infrastructureproducts.com.au/wp-content/uploads/2022/05/50201728-Riser-Concrete-400mm-2.png)
![](https://www.infrastructureproducts.com.au/wp-content/uploads/2022/05/50201653-RISER-CONCRETE-300mm-450x450x300x100mm-REBATE-d.png)
![](https://www.infrastructureproducts.com.au/wp-content/uploads/2022/05/50201657-RISER-CONCRETE-450mm-600X600X450X100mm-REBATE-d.png)
![](https://www.infrastructureproducts.com.au/wp-content/uploads/2022/05/50201658-RISER-CONCRETE-150mm-900x600x150x100mm-REBATEf.png)
![](https://www.infrastructureproducts.com.au/wp-content/uploads/2022/05/50201654-RISER-CONCRETE-450mm-450x450x450x100mm-REBATE-d.png)
![](https://www.infrastructureproducts.com.au/wp-content/uploads/2022/05/50201656-RISER-CONCRETE-300mm-600x600x300x100mm-REBATE-d.png)
![](https://www.infrastructureproducts.com.au/wp-content/uploads/2022/05/50201727-Riser-Concrete-300mm.png)
![](https://www.infrastructureproducts.com.au/wp-content/uploads/2022/05/50201655-RISER-CONCRETE-150mm-600x600x150x100mm-REBATE-d.png)
![](https://www.infrastructureproducts.com.au/wp-content/uploads/2022/05/50201645-PIT-CONCRETE-900x900x1050x95mm-CLASS-D-2.png)
![](https://www.infrastructureproducts.com.au/wp-content/uploads/2022/05/50201726-Riser-Concrete-200mm.png)
![](https://www.infrastructureproducts.com.au/wp-content/uploads/2022/05/50201652-RISER-CONCRETE-150mm-450x450x150x100mm-REBATE-d.png)
![](https://www.infrastructureproducts.com.au/wp-content/uploads/2022/05/50201624-PIT-CONCRETE-450x450x450x95mm-CLASS-D-2.png)
![](https://www.infrastructureproducts.com.au/wp-content/uploads/2022/05/50201630-PIT-CONCRETE-600x600x600x95mm-CLASS-D-2.png)
![](https://www.infrastructureproducts.com.au/wp-content/uploads/2022/05/50201628-PIT-CONCRETE-445x445x810x100mm-CLASS-D-2.png)
![](https://www.infrastructureproducts.com.au/wp-content/uploads/2022/05/50201629-PIT-CONCRETE-600x600x1050x100mm-CLASS-D-2.png)
![](https://www.infrastructureproducts.com.au/wp-content/uploads/2023/05/50201547-PIT-CONCRETE-1200x1200x1200x125mm-CLASS-D.png)
![](https://www.infrastructureproducts.com.au/wp-content/uploads/2022/05/50201549-PIT-CONCRETE-900x900x600x900mm-CLASS-Dd.png)
![](https://www.infrastructureproducts.com.au/wp-content/uploads/2022/05/50201550-PIT-CONCRETE-600x600x600x100mm-CLASS-Dd.png)
![](https://www.infrastructureproducts.com.au/wp-content/uploads/2022/05/50201551-PIT-CONCRETE-450x450x450x100mm-CLASS-D.png)
![](https://www.infrastructureproducts.com.au/wp-content/uploads/2022/05/50201532-RISER-CONCRETE-200mm-TO-SUIT-BELLTOP-8-1.png)
![](https://www.infrastructureproducts.com.au/wp-content/uploads/2022/05/50201537-AX-S™-COVER-GMS-TO-SUIT-NO.-8-LOCK-ADAPT-CLASS-B-1.png)
![](https://www.infrastructureproducts.com.au/wp-content/uploads/2022/05/50201539.png)
![](https://www.infrastructureproducts.com.au/wp-content/uploads/2022/05/50201546-PIT-CONCRETE-J10-CLASS-D-2.png)
![](https://www.infrastructureproducts.com.au/wp-content/uploads/2022/12/50201523-PIT-CONCRETE-1200x1200x1200x95mm-NSW-RAIL-KNOCKOUTS-CLASS-D.png)
![](https://www.infrastructureproducts.com.au/wp-content/uploads/2022/05/50201524-RISER-CONCRETE-300mm-1000x600x300x90mme.png)
![](https://www.infrastructureproducts.com.au/wp-content/uploads/2022/05/50201529-PIT-CONCRETE-BELLTOP-8-NO-FLOOR-CLASS-Da.png)
![](https://www.infrastructureproducts.com.au/wp-content/uploads/2022/05/50201527-PIT-CONCRETE-UNIVERSAL-8-NO-FLOOR-CLASS-B-2.png)
![](https://www.infrastructureproducts.com.au/wp-content/uploads/2022/05/50201521-PIT-CONCRETE-1200x1200x1200x95mm-CLASS-D.png)
![](https://www.infrastructureproducts.com.au/wp-content/uploads/2022/05/50201531-FLOOR-CONCRETE-TO-SUIT-BELLTOP-8.png)
![](https://www.infrastructureproducts.com.au/wp-content/uploads/2022/05/50201513-PIT-CONCRETE-1000x600x1000x90mm-NSW-RAIL-KNOCKOUTS-CLASS-D-2.png)
![](https://www.infrastructureproducts.com.au/wp-content/uploads/2023/04/50201859-AX-S™-COVER-GMS-TO-SUIT-450x450-OPENING-NON-REBATE-CLASS-Bx.png)
![](https://www.infrastructureproducts.com.au/wp-content/uploads/2022/05/50201511-PIT-CONCRETE-1000x1000x1200x90mm-NSW-RAIL-KNOCKOUTS-CLASS-D-2.png)
![](https://www.infrastructureproducts.com.au/wp-content/uploads/2022/05/50201517-PIT-CONCRETE-1000x1000x1200x90mm-NO-KNOCKOUTS-CLASS-D-2.png)
![](https://www.infrastructureproducts.com.au/wp-content/uploads/2022/05/50201512-FLOOR-CONCRETE-TO-SUIT-1000x600-PIT.png)
![](https://www.infrastructureproducts.com.au/wp-content/uploads/2022/05/50201867-AX-S™-MANHOLE-COVER-CAST-IRON-636x608-LOCKING-TELSTRA.png)
![](https://www.infrastructureproducts.com.au/wp-content/uploads/2022/05/50201852-AX-S™-COVER-GMS-TO-SUIT-1200x1200-OPENING-CLASS-C.png)
![](https://www.infrastructureproducts.com.au/wp-content/uploads/2022/05/50201858-AX-S™-COVER-GMS-TO-SUIT-600x600-OPENING-NON-REBATE-CLASS-B.png)
![](https://www.infrastructureproducts.com.au/wp-content/uploads/2022/05/50201174-AX-S™-P2-COVER-CONCRETE-TELSTRA-CLASS-A.png)
![](https://www.infrastructureproducts.com.au/wp-content/uploads/2022/05/50201181-AX-S™-P4-COVER-CONCRETE-TELSTRA-CLASS-A-1.png)
![](https://www.infrastructureproducts.com.au/wp-content/uploads/2022/05/50202574-AX-S™-P5-COVER-COMPOSITE-SMART-COMMS-LOCK-ADAPT-CLASS-Bd.png)
![](https://www.infrastructureproducts.com.au/wp-content/uploads/2022/05/50202580-AX-S™-P5-COVER-COMPOSITE-SMART-AARNET-LOCK-ADAPT-CLASS-B.png)
![](https://www.infrastructureproducts.com.au/wp-content/uploads/2022/05/50202576-AX-S™-P5-COVER-COMPOSITE-SMART-ELEC-LOCK-ADAPT-CLASS-B.png)
![](https://www.infrastructureproducts.com.au/wp-content/uploads/2022/05/50202572-AX-S™-P6-COVER-COMPOSITE-SMART-AARNET-LOCK-ADAPT-CLASS-B.png)
![](https://www.infrastructureproducts.com.au/wp-content/uploads/2022/05/50201510-RISER-CONCRETE-300mm-1000x1000x300x90mm.png)
![](https://www.infrastructureproducts.com.au/wp-content/uploads/2022/05/50201997-AX-S™-P2-COVER-COMPOSITE-SMART-NBN-CLASS-B.png)
![](https://www.infrastructureproducts.com.au/wp-content/uploads/2022/05/50201466-AX-S™-P6-COVER-CONCRETE-UECOMM-CLASS-A-1.png)
![](https://www.infrastructureproducts.com.au/wp-content/uploads/2022/05/50201467-AX-S™-P6-COVER-CONCRETE-SUPERLOOP-CLASS-A.png)
![](https://www.infrastructureproducts.com.au/wp-content/uploads/2022/05/50201444-AX-S™-P5-COVER-CONCRETE-VOCUS-CLASS-A.png)
![](https://www.infrastructureproducts.com.au/wp-content/uploads/2022/05/50201447-AX-S™-P5-COVER-CONCRETE-PLAIN-CLASS-A.png)
![](https://www.infrastructureproducts.com.au/wp-content/uploads/2022/05/50201453-AX-S-P5-COVER-CONCRETE-SUPERLOOP.png)
![](https://www.infrastructureproducts.com.au/wp-content/uploads/2022/05/50201433-AX-S™-P2-COVER-CONCRETE-PLAIN-CLASS-A.png)
![](https://www.infrastructureproducts.com.au/wp-content/uploads/2022/05/50201437-AX-S™-P3-COVER-CONCRETE-ELECTRICAL-CLASS-A.png)
![](https://www.infrastructureproducts.com.au/wp-content/uploads/2022/05/50201438-AX-S™-P3-COVER-CONCRETE-PLAIN-CLASS-A-1.png)
![](https://www.infrastructureproducts.com.au/wp-content/uploads/2022/05/50201425-AX-S™-P7-COVER-CONCRETE-COM-CAB-CLASS-A-4s.png)
![](https://www.infrastructureproducts.com.au/wp-content/uploads/2022/05/50201427-AX-S™-P7-COVER-CONCRETE-ELECTRICAL-CLASS-A-2-1.png)
![](https://www.infrastructureproducts.com.au/wp-content/uploads/2022/05/50201434-AX-S™-P3-COVER-CONCRETE-COM-CAB-CLASS-A-1.png)
![](https://www.infrastructureproducts.com.au/wp-content/uploads/2022/05/50201410-AX-S™-DIA390-COVER-GMS-SERVICE-ELECTRICAL.png)
![](https://www.infrastructureproducts.com.au/wp-content/uploads/2022/05/50201414-AX-S™-MANHOLE-COVER-FOOTWAY-CAST-IRON-797x625-1.png)
![](https://www.infrastructureproducts.com.au/wp-content/uploads/2022/05/50201415-AX-S™-DIA390mm-COVER-CONCRETE-COMMS-CLASS-A-4s.png)
![](https://www.infrastructureproducts.com.au/wp-content/uploads/2022/05/50201392-COVER-AND-FRAME-INFILL-762x762-CLASS-Bs-1.png)
![](https://www.infrastructureproducts.com.au/wp-content/uploads/2022/05/50201383-MONObox™-SERIES-44-s.png)
![](https://www.infrastructureproducts.com.au/wp-content/uploads/2022/05/50201387-COVER-AND-FRAME-INFILL-457x457-CLASS-B-2.png)
![](https://www.infrastructureproducts.com.au/wp-content/uploads/2022/05/50201417-AX-S™-DIA390mm-COVER-CONCRETE-PLAIN-CLASS-A-2.png)
![](https://www.infrastructureproducts.com.au/wp-content/uploads/2022/05/50201384-MONObox™-SERIES-66-1.png)
![](https://www.infrastructureproducts.com.au/wp-content/uploads/2022/05/50201372-MONObox™-ELECTRICAL-DISTRIBUTION-200x200-2.png)
![](https://www.infrastructureproducts.com.au/wp-content/uploads/2022/05/50201257-ENCASEMENT-1800x1800x200-with-99D-INFILL-CLASS-D-1.png)
![](https://www.infrastructureproducts.com.au/wp-content/uploads/2022/05/50201260-AX-S™-MANHOLE-COVER-CAST-IRON-792x620-CONC-REPLACMENT.png)
![](https://www.infrastructureproducts.com.au/wp-content/uploads/2022/05/50201255-ENCASEMENT-INFILL-1310x1310x200-WITH-99D-CLASS-D-4.png)
![](https://www.infrastructureproducts.com.au/wp-content/uploads/2022/05/50201256-ENCASEMENT-1500x1500x200-with-99D-INFILL-CLASS-D.png)
![](https://www.infrastructureproducts.com.au/wp-content/uploads/2022/05/50201230-AX-S™-COVER-GMS-TO-SUIT-1000x600-OPENING-CLASS-C.png)
![](https://www.infrastructureproducts.com.au/wp-content/uploads/2022/05/50201232a.png)
![](https://www.infrastructureproducts.com.au/wp-content/uploads/2022/05/50201233-PIT-CONCRETE-1000x600x1000x90mm-CLASS-D-2.png)
![](https://www.infrastructureproducts.com.au/wp-content/uploads/2022/05/50201244-AX-S™-COVER-GMS-TO-SUIT-NO.-5-LOCK-ADAPT-CLASS-B.png)
![](https://www.infrastructureproducts.com.au/wp-content/uploads/2022/05/50201251-AX-S™-DIA1050-COVER-GMS-RAIL-PIT-LOCK-ADAPT.png)
![](https://www.infrastructureproducts.com.au/wp-content/uploads/2022/05/50201205-AX-S™-COVER-GMS-TO-SUIT-1000x1000-OPENING-CLASS-C.png)
![](https://www.infrastructureproducts.com.au/wp-content/uploads/2022/05/50201223-AX-S™-COVER-GMS-TO-SUIT-BELLTOP-8-LOCKABLE-NONSLIPv.png)
![](https://www.infrastructureproducts.com.au/wp-content/uploads/2022/05/50201227-AX-S™-SCEC-SL1-C5-COVER-GMS.png)
![](https://www.infrastructureproducts.com.au/wp-content/uploads/2022/05/50201231-AX-S™-COVER-GMS-TO-SUIT-NO.-5-NONSLIP-LOCK-ADAPT-CLASS-B.png)
![](https://www.infrastructureproducts.com.au/wp-content/uploads/2022/05/50201179-AX-S™-P2-COVER-CONCRETE-ELECTRICAL-CLASS-A-1.png)
![](https://www.infrastructureproducts.com.au/wp-content/uploads/2022/05/50201180-AX-S™-P2-COVER-CONCRETE-NBN-ELEC-CLASS-A.png)
![](https://www.infrastructureproducts.com.au/wp-content/uploads/2022/05/50201182-AX-S™-P5-COVER-CONCRETE-TPG-CLASS-A.png)
![](https://www.infrastructureproducts.com.au/wp-content/uploads/2022/05/50201203-AX-S™-SCEC-SL1-TO-SUIT-1100x900-OPENING-COVER-GMS.png)
![](https://www.infrastructureproducts.com.au/wp-content/uploads/2022/05/50201170-AX-S™-P2-COVER-CONCRETE-NBN-CLASS-A.png)
![](https://www.infrastructureproducts.com.au/wp-content/uploads/2022/05/50201175-AX-S™-P4-COVER-CONCRETE-ELECTRICAL-CLASS-A.png)
![](https://www.infrastructureproducts.com.au/wp-content/uploads/2022/05/50201176-AX-S™-P2-COVER-CONCRETE-COMMS-CLASS-A.png)
![](https://www.infrastructureproducts.com.au/wp-content/uploads/2022/05/50201178-AX-S™-P6-COVER-CONCRETE-TPG-CLASS-A.png)
![](https://www.infrastructureproducts.com.au/wp-content/uploads/2022/05/50201157-PIT-CONCRETE-1000x1000x1200-CLASS-D-4-s.png)
![](https://www.infrastructureproducts.com.au/wp-content/uploads/2022/05/50201159-ASSEMBLY-MANHOLE-FRAME-AND-COVER-6-PART.png)
![](https://www.infrastructureproducts.com.au/wp-content/uploads/2022/05/50201169-AX-S™-P5-COVER-CONCRETE-COMMS-CLASS-A-1.png)
![](https://www.infrastructureproducts.com.au/wp-content/uploads/2022/05/50201035-MANHOLE-CROSS-BAR-LOCKABLE-1326mm-2.png)
![](https://www.infrastructureproducts.com.au/wp-content/uploads/2022/05/50201030-MONObox™-ELECTRICAL-DISTRIBUTION-DIA390x600-2.png)
![](https://www.infrastructureproducts.com.au/wp-content/uploads/2022/05/50202456-FLOOR-CONCRETE-TO-SUIT-1000x1000-ULTIMA-PIT-QLD-RAIL.png)
![](https://www.infrastructureproducts.com.au/wp-content/uploads/2022/05/50202453-FLOOR-CONCRETE-TO-SUIT-1000x600-ULTIMA-PIT-QLD-RAIL.png)
![](https://www.infrastructureproducts.com.au/wp-content/uploads/2022/05/50204599-APRON-MGDG-STANDARD-2300x1740x250-DIAMOND-GRATE-AND-FRAME-RMS-CLASS-D.png)
![](https://www.infrastructureproducts.com.au/wp-content/uploads/2022/05/50204600-APRON-MGDG-DOUBLE-SAG-2300x1740x250-DIAMOND-GRATE-AND-FRAME-RMS-CLASS-D.png)
![](https://www.infrastructureproducts.com.au/wp-content/uploads/2022/05/50201254-PIT-CONCRETE-MANHOLE-PF4T-2cx.png)
![](https://www.infrastructureproducts.com.au/wp-content/uploads/2022/05/50201475-PIT-CONCRETE-MANHOLE-PF12-CLASS-D-2-1.png)
![](https://www.infrastructureproducts.com.au/wp-content/uploads/2022/07/50201476-PIT-CONCRETE-MANHOLE-PF12F-CLASS-D.png)
![](https://www.infrastructureproducts.com.au/wp-content/uploads/2022/05/50201109-PIT-CONCRETE-TYPE-B-COMPLETE-CLASS-Bg.png)
![](https://www.infrastructureproducts.com.au/wp-content/uploads/2022/05/50201472-PIT-CONCRETE-MANHOLE-PF4fe.png)
![](https://www.infrastructureproducts.com.au/wp-content/uploads/2023/05/50201473-PIT-CONCRETE-MANHOLE-PF4F.png)
![](https://www.infrastructureproducts.com.au/wp-content/uploads/2022/05/50201544-FLOOR-CONCRETE-TO-SUIT-J9-J10-PIT-TELSTRA.png)
![](https://www.infrastructureproducts.com.au/wp-content/uploads/2022/05/50201224-PIT-CONCRETE-MANHOLE-TYPE-A-CLASS-D-2.png)
![](https://www.infrastructureproducts.com.au/wp-content/uploads/2022/05/50201542-Pit-Concrete-Telstra-C9-Class-Bd.png)
![](https://www.infrastructureproducts.com.au/wp-content/uploads/2022/05/50201543-PIT-CONCRETE-J9-NO-FLOOR-CLASS-B-2.png)
![](https://www.infrastructureproducts.com.au/wp-content/uploads/2022/05/50201246-COLLAR-CONCRETE-JOINTING-POST-BASE.png)
![](https://www.infrastructureproducts.com.au/wp-content/uploads/2022/05/50201545-PIT-CONCRETE-TELSTRA-C10-CLASS-Bd.png)
![](https://www.infrastructureproducts.com.au/wp-content/uploads/2022/05/50201418-AX-S™-TYPE-B-COVER-CONCRETE-CLASS-A.png)
![](https://www.infrastructureproducts.com.au/wp-content/uploads/2022/05/50201419-AX-S™-TYPE-C-COVER-CONCRETE-CLASS-A.png)
![](https://www.infrastructureproducts.com.au/wp-content/uploads/2022/05/50201424-AX-S™-P7-COVER-CONCRETE-TELSTRA-CLASS-A.png)
![](https://www.infrastructureproducts.com.au/wp-content/uploads/2022/05/50201905-AX-S™-P5-COVER-CAST-IRON-TELSTRA-LOCKING-CLASS-B.png)
![](https://www.infrastructureproducts.com.au/wp-content/uploads/2022/05/50201367-MONObox™-P7-PLASTIC-PIT-2.png)
![](https://www.infrastructureproducts.com.au/wp-content/uploads/2022/05/50201365-MONObox™-P5-800-PLASTIC-PIT-2.png)
![](https://www.infrastructureproducts.com.au/wp-content/uploads/2022/05/50201796-P68-FORTRESS-CONCRETE-SURROUND-KIT.png)
![](https://www.infrastructureproducts.com.au/wp-content/uploads/2022/05/50203930-HS9-STAKKAbox™-ULTIMA-ADJUSTABLE-FRAME-AND-SURROUND-KITw.png)
![](https://www.infrastructureproducts.com.au/wp-content/uploads/2022/05/50201790-HS6-8-STAKKABOX-FORTRESS-ADJUSTABILITY.png)
![](https://www.infrastructureproducts.com.au/wp-content/uploads/2022/05/50201795-P6-8-FORTRESS-CABLE-SUPPORT-KITs.png)
![](https://www.infrastructureproducts.com.au/wp-content/uploads/2022/05/50201780-TOP-FRAME-FRAME-FORTRESS-ASSEMBLY-1.png)
![](https://www.infrastructureproducts.com.au/wp-content/uploads/2022/05/50202762-STAKKAbox™-ULTIMA-Connect-HS9-PITs.png)
![](https://www.infrastructureproducts.com.au/wp-content/uploads/2022/05/50201797-P6-8-FORTRESS-PIT-BASE-KIT.png)
![](https://www.infrastructureproducts.com.au/wp-content/uploads/2022/05/50203571-HS-PART-A-AND-PART-B-ONLYf.png)
![](https://www.infrastructureproducts.com.au/wp-content/uploads/2022/05/50203570-HS5-FRAME-AND-SURROUND-KIT-WITHOUT-PART-A-AND-PART-B-1.png)
![](https://www.infrastructureproducts.com.au/wp-content/uploads/2022/05/50202357-RISER-KIT-HS-STAKKABOX-FORTRESS-150MM.png)
![](https://www.infrastructureproducts.com.au/wp-content/uploads/2022/05/50201806-HS-FRAME-AND-SURROUND-KIT.png)
![](https://www.infrastructureproducts.com.au/wp-content/uploads/2022/05/50201380-MONObox™-P4-PLASTIC-RISER.png)
![](https://www.infrastructureproducts.com.au/wp-content/uploads/2022/05/50201885-AX-S™-P4-COVER-CAST-IRON-TELSTRA-LOCK-ADAPT-CLASS-B-1.png)
![](https://www.infrastructureproducts.com.au/wp-content/uploads/2022/05/50201805-HS5-RING-SECTION.png)
![](https://www.infrastructureproducts.com.au/wp-content/uploads/2022/05/50201171-AX-S™-P4-COVER-COMPOSITE-SMART-TELSTRA-CLASS-B.png)
![](https://www.infrastructureproducts.com.au/wp-content/uploads/2022/05/50201177-AX-S™-P3-COVER-CONCRETE-TELSTRA-CLASS-A.png)
![](https://www.infrastructureproducts.com.au/wp-content/uploads/2022/05/50201362-MONObox™-P3-PLASTIC-PIT-400x400-2.png)
![](https://www.infrastructureproducts.com.au/wp-content/uploads/2022/05/50201436-AX-S™-P2-COVER-CONCRETE-TELSTRA-ELEC-CLASS-A.png)
![](https://www.infrastructureproducts.com.au/wp-content/uploads/2022/05/50201879-AX-S™-P2-COVER-CAST-IRON-TELSTRA-LOCK-ADAPT-CLASS-B-1.png)
![](https://www.infrastructureproducts.com.au/wp-content/uploads/2023/10/50201184-AX-S™-P2-COVER-COMPOSITE-SMART-TELSTRA-CLASS-B.png)
![](https://www.infrastructureproducts.com.au/wp-content/uploads/2022/05/50206959-ENCASEMENT-GRATE-1000x1000x150-WITH-600x600-CLASS-A-2.png)
![](https://www.infrastructureproducts.com.au/wp-content/uploads/2023/10/50206825-SOLID-ENCASEMENT-SOLID-850x850x150-WITH-450x450-CLASS-B-11.png)
![](https://www.infrastructureproducts.com.au/wp-content/uploads/2022/05/50206953-GRATE-ENCASEMENT-GRATE-1600x1600x250-WITH-1200x1200-CLASS-D.png)
![](https://www.infrastructureproducts.com.au/wp-content/uploads/2022/05/50206956-ENCASEMENT-GRATE-850x850x150-WITH-450x450-CLASS-A.png)
![](https://www.infrastructureproducts.com.au/wp-content/uploads/2022/05/50206828-ENCASEMENT-SOLID-1000x1000x250-WITH-600x600-CLASS-B-1.png)
![](https://www.infrastructureproducts.com.au/wp-content/uploads/2022/05/50206954-GRATE-ENCASEMENT-GRATE-1600x1600x250-WITH-1200x1200-CLASS-B.png)
![](https://www.infrastructureproducts.com.au/wp-content/uploads/2022/05/50206955-GRATE-ENCASEMENT-GRATE-1600x1600x250-WITH-1200x1200-CLASS-D.png)
![](https://www.infrastructureproducts.com.au/wp-content/uploads/2023/10/50206832.png)
![](https://www.infrastructureproducts.com.au/wp-content/uploads/2022/05/50207075-ENCASEMENT-GRATE-1300x1000x250-WITH-900x600-HEELGUARD-CLASS-D.png)
![](https://www.infrastructureproducts.com.au/wp-content/uploads/2022/05/50206962-ENCASEMENT-GRATE-1300x1000x150-WITH-900x600-CLASS-A.png)
![](https://www.infrastructureproducts.com.au/wp-content/uploads/2022/05/50206965-ENCASEMENT-GRATE-1300x1300x150-WITH-900x900-CLASS-A.png)
![](https://www.infrastructureproducts.com.au/wp-content/uploads/2023/10/50206833.png)
![](https://www.infrastructureproducts.com.au/wp-content/uploads/2022/05/50206958-ENCASEMENT-GRATE-850x850x250-WITH-450x450-CLASS-D-2.png)
![](https://www.infrastructureproducts.com.au/wp-content/uploads/2022/05/50206957-ENCASEMENT-GRATE-850x850x150-WITH-450x450-CLASS-B.png)
![](https://www.infrastructureproducts.com.au/wp-content/uploads/2023/10/50201706.png)
![](https://www.infrastructureproducts.com.au/wp-content/uploads/2023/10/50201704-ENCASEMENT-INFILL-1800x1800x200-WITH-99B-CLASS-B.png)
![](https://www.infrastructureproducts.com.au/wp-content/uploads/2022/05/50206827-B.png)
![](https://www.infrastructureproducts.com.au/wp-content/uploads/2023/10/50206830de.png)
![](https://www.infrastructureproducts.com.au/wp-content/uploads/2023/10/50201690-ENCASEMENT-1200x1200x200-with-66B-INFILL-CLASS-B.png)
![](https://www.infrastructureproducts.com.au/wp-content/uploads/2023/10/50201703.png)
![](https://www.infrastructureproducts.com.au/wp-content/uploads/2023/10/50204589.png)
![](https://www.infrastructureproducts.com.au/wp-content/uploads/2022/05/50206961-ENCASEMENT-GRATE-1000x1000x150-WITH-600x600-CLASS-D-2.png)
![](https://www.infrastructureproducts.com.au/wp-content/uploads/2022/05/50206966-ENCASEMENT-GRATE-1300x1300x150-WITH-900x900-CLASS-B.png)
![](https://www.infrastructureproducts.com.au/wp-content/uploads/2022/05/50206967-ENCASEMENT-GRATE-1300x1300x250-WITH-900x900-CLASS-D.png)
![](https://www.infrastructureproducts.com.au/wp-content/uploads/2022/05/50206964-GRATE-ENCASEMENT-GRATE-1300x1000x250-WITH-900x600-HINGED.png)
![](https://www.infrastructureproducts.com.au/wp-content/uploads/2023/10/50202423-ENCASEMENT-INFILL-1000x1000x200-WITH-66B-CLASS-B.png)
![](https://www.infrastructureproducts.com.au/wp-content/uploads/2023/10/50201688.png)
![](https://www.infrastructureproducts.com.au/wp-content/uploads/2023/10/50201686-ENCASEMENT-860x860x200-WITH-44D-CLASS-B.png)
![](https://www.infrastructureproducts.com.au/wp-content/uploads/2023/10/50201696.png)
![](https://www.infrastructureproducts.com.au/wp-content/uploads/2022/05/50201504-RISER-CONCRETE-200mm-TO-SUIT-C5-SCEC-COVER.png)
![](https://www.infrastructureproducts.com.au/wp-content/uploads/2022/05/50201158-MONObox™-P4-PLASTIC-PIT-2.png)
![](https://www.infrastructureproducts.com.au/wp-content/uploads/2022/05/50201430-AX-S™-P1-COVER-CONCRETE-PLAIN-CLASS-A.png)
![](https://www.infrastructureproducts.com.au/wp-content/uploads/2022/12/50201431-AX-S™-P1-COVER-CONCRETE-COM-CAB-CLASS-A.png)
![](https://www.infrastructureproducts.com.au/wp-content/uploads/2022/05/50201423-AX-S™-P13-COVER-CONCRETE-PLAIN-CLASS-A.png)
![](https://www.infrastructureproducts.com.au/wp-content/uploads/2022/05/50201183-AX-S™-P1-COVER-CONCRETE-ELECTRICAL-CLASS-A.png)
![](https://www.infrastructureproducts.com.au/wp-content/uploads/2022/05/50201022-MONObox™-P5-PLASTIC-PIT-2.png)
![](https://www.infrastructureproducts.com.au/wp-content/uploads/2022/05/50201371-MONObox™-P13-PLASTIC-PIT-2.png)
![](https://www.infrastructureproducts.com.au/wp-content/uploads/2022/05/50202567-AX-S™-P6-COVER-COMPOSITE-SMART-ELEC-CLASS-B.png)
![](https://www.infrastructureproducts.com.au/wp-content/uploads/2022/05/50202568-AX-S™-P6-COVER-COMPOSITE-SMART-ELEC-LOCK-ADAPT-CLASS-B.png)
![](https://www.infrastructureproducts.com.au/wp-content/uploads/2022/05/50202565-AX-S™-P6-COVER-COMPOSITE-SMART-COMMS-CLASS-B.png)
![](https://www.infrastructureproducts.com.au/wp-content/uploads/2022/05/50203549.png)
![](https://www.infrastructureproducts.com.au/wp-content/uploads/2022/05/50202000-AX-S™-P6-COVER-COMPOSITE-SMART-NBN-CLASS-B.png)
![](https://www.infrastructureproducts.com.au/wp-content/uploads/2022/05/50202566-AX-S™-P6-COVER-COMPOSITE-SMART-COMMS-LOCK-ADAPT-CLASS-B.png)
![](https://www.infrastructureproducts.com.au/wp-content/uploads/2022/05/50201459-AX-S™-P6-COVER-CONCRETE-ELECTRICAL-CLASS-A.png)
![](https://www.infrastructureproducts.com.au/wp-content/uploads/2022/05/50201899-AX-S™-P6-COVER-CAST-IRON-TELSTRA-LOCKING-CLASS-B-1.png)
![](https://www.infrastructureproducts.com.au/wp-content/uploads/2022/05/50201458-AX-S™-P6-COVER-CONCRETE-VOCUS-CLASS-A.png)
![](https://www.infrastructureproducts.com.au/wp-content/uploads/2022/05/50202575-AX-S™-P5-COVER-COMPOSITE-SMART-ELEC-CLASS-B-3.png)
![](https://www.infrastructureproducts.com.au/wp-content/uploads/2023/10/50206826-INFILL-ENCASEMENT-INFILL-850x850x250-WITH-450x450-CLASS-D.png)
![](https://www.infrastructureproducts.com.au/wp-content/uploads/2022/05/50202344-ENCASEMENT-INFILL-1000x1000x200-WITH-A44DT-CLASS-D-B.png)
![](https://www.infrastructureproducts.com.au/wp-content/uploads/2022/05/50204844-COVER-AND-FRAME-GMS-SOLID-600x600-CLASS-B-1.png)
![](https://www.infrastructureproducts.com.au/wp-content/uploads/2022/05/50201078-AX-S™-P6-COVER-CONCRETE-NBN-CLASS-A.png)
![](https://www.infrastructureproducts.com.au/wp-content/uploads/2022/05/50201146-AX-S™-DIA390mm-COVER-CONCRETE-ELECTRICAL-CLASS-A-3.png)
![](https://www.infrastructureproducts.com.au/wp-content/uploads/2022/05/50201144-AX-S™-SCEC-SL1-C2-COVER-GMS.png)
![](https://www.infrastructureproducts.com.au/wp-content/uploads/2022/05/50201168-AX-S™-P5-COVER-COMPOSITE-SMART-NBN-CLASS-B-1.png)
![](https://www.infrastructureproducts.com.au/wp-content/uploads/2022/05/50201173-AX-S™-P6-COVER-CONCRETE-COMMS-CLASS-A-2.png)
![](https://www.infrastructureproducts.com.au/wp-content/uploads/2022/05/50201368-PIT-PATCH-KIT-50-OFF.png)
![](https://www.infrastructureproducts.com.au/wp-content/uploads/2022/05/50201455-AX-S™-P6-COVER-CONCRETE-VICTRACK-COMMS-CLASS-A.png)
![](https://www.infrastructureproducts.com.au/wp-content/uploads/2022/05/50201059-PIT-CONCRETE-BELLTOP-1100x900x1050-CLASS-Ds.png)
![](https://www.infrastructureproducts.com.au/wp-content/uploads/2022/05/50201032-ASSEMBLY-MANHOLE-FRAME-AND-COVER-4-PART-4.png)
![](https://www.infrastructureproducts.com.au/wp-content/uploads/2024/05/50201058.png)
![](https://www.infrastructureproducts.com.au/wp-content/uploads/2022/05/50201077-AX-S™-P5-COVER-CONCRETE-NBN-CLASS-A-2.png)
![](https://www.infrastructureproducts.com.au/wp-content/uploads/2022/05/50201113-MONObox™-P6-8-PLASTIC-RISER-1.png)
![](https://www.infrastructureproducts.com.au/wp-content/uploads/2022/05/50201491.png)
![](https://www.infrastructureproducts.com.au/wp-content/uploads/2023/05/50201492.png)
![](https://www.infrastructureproducts.com.au/wp-content/uploads/2022/05/50201493-PIT-CONCRETE-MANHOLE-TURRET-400mm.png)
![](https://www.infrastructureproducts.com.au/wp-content/uploads/2023/07/50201261.png)
![](https://www.infrastructureproducts.com.au/wp-content/uploads/2022/05/50201074-AX-S™-P6-COVER-COMPOSITE-SMART-TELSTRA-CLASS-B.png)
![](https://www.infrastructureproducts.com.au/wp-content/uploads/2022/05/50201225-AX-S™-P6-COVER-CAST-IRON-TELSTRA-LOCK-ADAPT-CLASS-B-B.png)
![](https://www.infrastructureproducts.com.au/wp-content/uploads/2022/05/50201262-AX-S™-P6-RECESSED-COVER-CAST-IRON-WITH-FRAME-1.png)
![](https://www.infrastructureproducts.com.au/wp-content/uploads/2022/05/50201898-AX-S™-P4-COVER-CAST-IRON-TELSTRA-LOCKING-CLASS-B.png)
![](https://www.infrastructureproducts.com.au/wp-content/uploads/2022/05/50201154-MONObox™-P5-PLASTIC-RISER.png)
![](https://www.infrastructureproducts.com.au/wp-content/uploads/2022/05/50201073-AX-S™-P5-COVER-COMPOSITE-SMART-TELSTRA-CLASS-B.png)
![](https://www.infrastructureproducts.com.au/wp-content/uploads/2022/05/50201226-AX-S™-P5-COVER-CAST-IRON-TELSTRA-LOCK-ADPAT-CLASS-B-1.png)
![](https://www.infrastructureproducts.com.au/wp-content/uploads/2022/05/50201172-AX-S™-P5-COVER-CONCRETE-ELECTRICAL-CLASS-A.png)
![](https://www.infrastructureproducts.com.au/wp-content/uploads/2022/05/50201360-MONObox™-P1-PLASTIC-PIT-2.png)
![](https://www.infrastructureproducts.com.au/wp-content/uploads/2022/05/50201429-AX-S™-P1-COVER-CONCRETE-TELSTRA-CLASS-A.png)
![](https://www.infrastructureproducts.com.au/wp-content/uploads/2022/05/50201895-AX-S™-P1-COVER-CAST-IRON-TELSTRA-CLASS-B-4.png)
![](https://www.infrastructureproducts.com.au/wp-content/uploads/2022/05/50201422-AX-S™-P13-COVER-CONCRETE-TELSTRA-CLASS-A-3.png)
![](https://www.infrastructureproducts.com.au/wp-content/uploads/2022/05/50201897-AX-S™-P2-COVER-CAST-IRON-TELSTRA-LOCKING-CLASS-B-1.png)
![](https://www.infrastructureproducts.com.au/wp-content/uploads/2022/05/50201161-MONObox™-P2-PLASTIC-PIT-2.png)
![](https://www.infrastructureproducts.com.au/wp-content/uploads/2022/05/50201880-AX-S™-P3-COVER-CAST-IRON-TELSTRA-CLASS-B-1.png)
![](https://www.infrastructureproducts.com.au/wp-content/uploads/2022/05/50205168-KERB-UNIT-INTAKE-KIL-RIGHT-HAND-2400MM.png)
![](https://www.infrastructureproducts.com.au/wp-content/uploads/2022/05/50205025-KERB-UNIT-INTAKE-KIL-LEFT-HAND-2400MM-2.png)
![](https://www.infrastructureproducts.com.au/wp-content/uploads/2022/05/50205024-KERB-UNIT-INTAKE-KIL-SAG-2400MM-1.png)
![](https://www.infrastructureproducts.com.au/wp-content/uploads/2022/05/50207103-KERB-UNIT-INTAKE-TMR-KIL-RIGHT-HAND-4800mm.png)
![](https://www.infrastructureproducts.com.au/wp-content/uploads/2022/05/50207104-KERB-UNIT-INTAKE-TMR-KIL-LEFT-HAND-4800mm.png)
![](https://www.infrastructureproducts.com.au/wp-content/uploads/2022/05/50207102-KERB-UNIT-INTAKE-TMR-KIL-SAG-3600mm-2.png)
![](https://www.infrastructureproducts.com.au/wp-content/uploads/2022/05/50207105-KERB-UNIT-INTAKE-TMR-KIL-SAG-4800mm.png)
![](https://www.infrastructureproducts.com.au/wp-content/uploads/2022/05/50207095-KERB-UNIT-INTAKE-TMR-LIL-LEFT-HAND-3600mmd.png)
![](https://www.infrastructureproducts.com.au/wp-content/uploads/2022/05/50207097-KERB-UNIT-INTAKE-TMR-LIL-RIGHT-HAND-4800mmfff.png)
![](https://www.infrastructureproducts.com.au/wp-content/uploads/2022/05/50207096-KERB-UNIT-INTAKE-TMR-LIL-SAG-3600mm.png)
![](https://www.infrastructureproducts.com.au/wp-content/uploads/2023/08/50207098-KERB-UNIT-INTAKE-TMR-LIL-LEFT-HAND-4800mm.png)
![](https://www.infrastructureproducts.com.au/wp-content/uploads/2022/05/50207101-KERB-UNIT-INTAKE-TMR-KIL-LEFT-HAND-3600mm.png)
![](https://www.infrastructureproducts.com.au/wp-content/uploads/2022/05/50207099-KERB-UNIT-INTAKE-TMR-LIL-SAG-4800mm.png)
![](https://www.infrastructureproducts.com.au/wp-content/uploads/2022/05/50207100-KERB-UNIT-INTAKE-TMR-KIL-RIGHT-HAND-3600mm-2.png)
![](https://www.infrastructureproducts.com.au/wp-content/uploads/2022/05/50202684-ENCASEMENT-SOLID-1500x1500x200-WITH-99D-CLASS-D.png)
![](https://www.infrastructureproducts.com.au/wp-content/uploads/2022/05/50204842-KERB-UNIT-INTAKE-TMR-LIL-RIGHT-HAND-2400MM.png)
![](https://www.infrastructureproducts.com.au/wp-content/uploads/2022/05/50205023-KERB-UNIT-INTAKE-TMR-LIL-LEFT-HAND-2400MM-2.png)
![](https://www.infrastructureproducts.com.au/wp-content/uploads/2022/05/50207094-KERB-UNIT-INTAKE-TMR-LIL-RIGHT-HAND-3600mm.png)
![](https://www.infrastructureproducts.com.au/wp-content/uploads/2022/05/50205164-KERB-UNIT-INTAKE-TMR-LIL-SAG-2400mm-2.png)
![](https://www.infrastructureproducts.com.au/wp-content/uploads/2023/10/50202919.png)
![](https://www.infrastructureproducts.com.au/wp-content/uploads/2023/10/50206829.png)
![](https://www.infrastructureproducts.com.au/wp-content/uploads/2023/10/50201695-ENCASEMENT-SOLID-1200x1200x200-WITH-66DS-CLASS-D.png)
![](https://www.infrastructureproducts.com.au/wp-content/uploads/2022/05/50206960-ENCASEMENT-GRATE-1000x1000x150-WITH-600x600-CLASS-B-2.png)
![](https://www.infrastructureproducts.com.au/wp-content/uploads/2022/05/50206963-ENCASEMENT-GRATE-1300x1000x150-WITH-900x600-CLASS-B.png)
![](https://www.infrastructureproducts.com.au/wp-content/uploads/2023/10/50204220.png)
![](https://www.infrastructureproducts.com.au/wp-content/uploads/2023/08/50202347-ENCASEMENT-INFILL-1290x990x200-WITH-96D-CLASS-D.png)
![](https://www.infrastructureproducts.com.au/wp-content/uploads/2022/12/50204284-ENCASEMENT-INFILL-1500x1500x200-WITH-99D-OFFSET-CLASS-D.png)
![](https://www.infrastructureproducts.com.au/wp-content/uploads/2022/05/50204221.png)
![](https://www.infrastructureproducts.com.au/wp-content/uploads/2023/10/50201697.png)
![](https://www.infrastructureproducts.com.au/wp-content/uploads/2023/10/50201698.png)
![](https://www.infrastructureproducts.com.au/wp-content/uploads/2023/10/50201701.png)
![](https://www.infrastructureproducts.com.au/wp-content/uploads/2023/10/50201692.png)
![](https://www.infrastructureproducts.com.au/wp-content/uploads/2022/05/50201693.png)
![](https://www.infrastructureproducts.com.au/wp-content/uploads/2023/10/50201694.png)
![](https://www.infrastructureproducts.com.au/wp-content/uploads/2022/05/50201376-MONObox™-ELECTRICAL-DISTRIBUTION-390x900-NO-HOLES-2.png)
![](https://www.infrastructureproducts.com.au/wp-content/uploads/2023/10/50206834.png)
![](https://www.infrastructureproducts.com.au/wp-content/uploads/2023/10/50206831.png)
![](https://www.infrastructureproducts.com.au/wp-content/uploads/2023/10/50202343-Encasement-Infill-1000x1000x200-with-44B-Class-B-1.png)
![](https://www.infrastructureproducts.com.au/wp-content/uploads/2023/10/50206824-INFILL-ENCASEMENT-INFILL-850x850x150-WITH-450x450-CLASS-B.png)
![](https://www.infrastructureproducts.com.au/wp-content/uploads/2022/05/50202346-ENCASEMENT-INFILL-1290x990x200-WITH-96B-CLASS-B.png)
![](https://www.infrastructureproducts.com.au/wp-content/uploads/2023/10/50202917.png)
![](https://www.infrastructureproducts.com.au/wp-content/uploads/2022/05/50201450-AX-S™-P5-COVER-CONCRETE-RAIL-SIGNAL-CLASS-A.png)
![](https://www.infrastructureproducts.com.au/wp-content/uploads/2022/05/50201464-AX-S™-P6-COVER-CONCRETE-RAIL-SIGNAL-COMMS-CLASS-A.png)
![](https://www.infrastructureproducts.com.au/wp-content/uploads/2023/10/50205117.png)
![](https://www.infrastructureproducts.com.au/wp-content/uploads/2022/05/50202647-LINTEL-SM2-VIC-ROADS-DOUBLE-2300X-PLSM2V18-2.png)
![](https://www.infrastructureproducts.com.au/wp-content/uploads/2022/05/50202648-LINTEL-SM2-VIC-ROADS-SINGLE-1300X-PLSM2V13-2.png)
![](https://www.infrastructureproducts.com.au/wp-content/uploads/2023/10/50202915.png)
![](https://www.infrastructureproducts.com.au/wp-content/uploads/2022/05/50202643-LINTEL-B2-AUS-PITS-SINGLE-1300X-PLB2A-2.png)
![](https://www.infrastructureproducts.com.au/wp-content/uploads/2022/05/50202646-LINTEL-SM2-AUSPITS-SINGLE-1300X-2.png)
![](https://www.infrastructureproducts.com.au/wp-content/uploads/2022/05/50201263-AX-S™-DIA390-COVER-CONCRETE-ELECTRICAL-DANGER-ESS-ENERGY-CLASS.png)
![](https://www.infrastructureproducts.com.au/wp-content/uploads/2022/05/50201421-AX-S™-P13-COVER-CONCRETE-ELECTRICAL-CLASS-A.png)
![](https://www.infrastructureproducts.com.au/wp-content/uploads/2022/05/50202635-COVER-CONCRETE-JUNCTION-1100x800x100.png)
![](https://www.infrastructureproducts.com.au/wp-content/uploads/2022/05/50201241-MULTIduct™-GASKET-4-WAY-XL-3.png)
![](https://www.infrastructureproducts.com.au/wp-content/uploads/2022/05/50201242-MULTIduct™-GASKET-6-WAY-2.png)
![](https://www.infrastructureproducts.com.au/wp-content/uploads/2023/10/50201259.png)
![](https://www.infrastructureproducts.com.au/wp-content/uploads/2022/05/50201243-MULTIduct™-GASKET-9-WAY-2.png)
![](https://www.infrastructureproducts.com.au/wp-content/uploads/2022/05/50201235-MULTIduct-4-Way.png)
![](https://www.infrastructureproducts.com.au/wp-content/uploads/2022/05/50201238-MULTIduct™-UNIT-6-WAY.png)
![](https://www.infrastructureproducts.com.au/wp-content/uploads/2022/05/50201237-MULTIduct™-UNIT-4-WAY-XL.png)
![](https://www.infrastructureproducts.com.au/wp-content/uploads/2022/05/50201441-AX-S™-P4-COVER-CONCRETE-PLAIN-CLASS-A-1.png)
![](https://www.infrastructureproducts.com.au/wp-content/uploads/2022/05/50201817-AX-S™-P5-COVER-CONCRETE-COMMS-VICTRACK-CLASS-A-1.png)
![](https://www.infrastructureproducts.com.au/wp-content/uploads/2022/05/50201440-AX-S™-P4-COVER-CONCRETE-COM-CAB-CLASS-A-1.png)
Related Projects
![](https://www.infrastructureproducts.com.au/wp-content/uploads/2022/07/Pakenham-Rail-Upgrade-400x300.jpg)
Pakenham Rail Infrastructure Upgrade
![](https://www.infrastructureproducts.com.au/wp-content/uploads/2022/05/Brisbane-Airport-400x300.png)